21 Real Estate Photography Tips That Sell Listings (2026)
By the Plotpane Editorial Team · Published June 1, 2026 · Updated June 2, 2026
The best real estate photography tips have nothing to do with owning an expensive camera — and everything to do with how buyers actually shop. A buyer's first showing doesn't happen at your open house. It happens on a phone, on the couch, three seconds at a time, as someone swipes through dozens of listings. Your photos are the only thing standing between "let's book a tour" and an endless scroll past your property.
The data is blunt about it. In the National Association of Realtors' 2024 Profile of Home Buyers and Sellers, 100% of buyers used the internet to search, and they ranked photos as the single most valuable feature on a listing website — 41%, ahead of detailed property information (39%) and floor plans (31%). A Redfin study found the sharpest 10% of listing photos sold at or above list price 44% of the time, versus just 13% for photos with only average sharpness.
Translation: clear, well-composed photos aren't decoration. They're the marketing foundation of any serious listing business, working while you sleep.
Below are 21 real estate photography tips that working photographers and top-producing agents actually use — ordered the way you'd run a real shoot, from prep to the final twilight hero shot. Every shooting tip is paired with a "perfect it in 90 seconds" editing note, because even a great frame usually needs a quick, honest cleanup before it hits the MLS.
Quick Summary: Strong listing photos come down to four things: prep the property, shoot with a level wide-angle camera at chest height, compose with the 3-wall and 20-60-20 rules, and control your light (bracket for windows, bounce a flash or two). Get those right in camera, then fix the small stuff — leaning walls, gray skies, a stray bin — in seconds with structure-preserving AI editing that never reinvents the property.
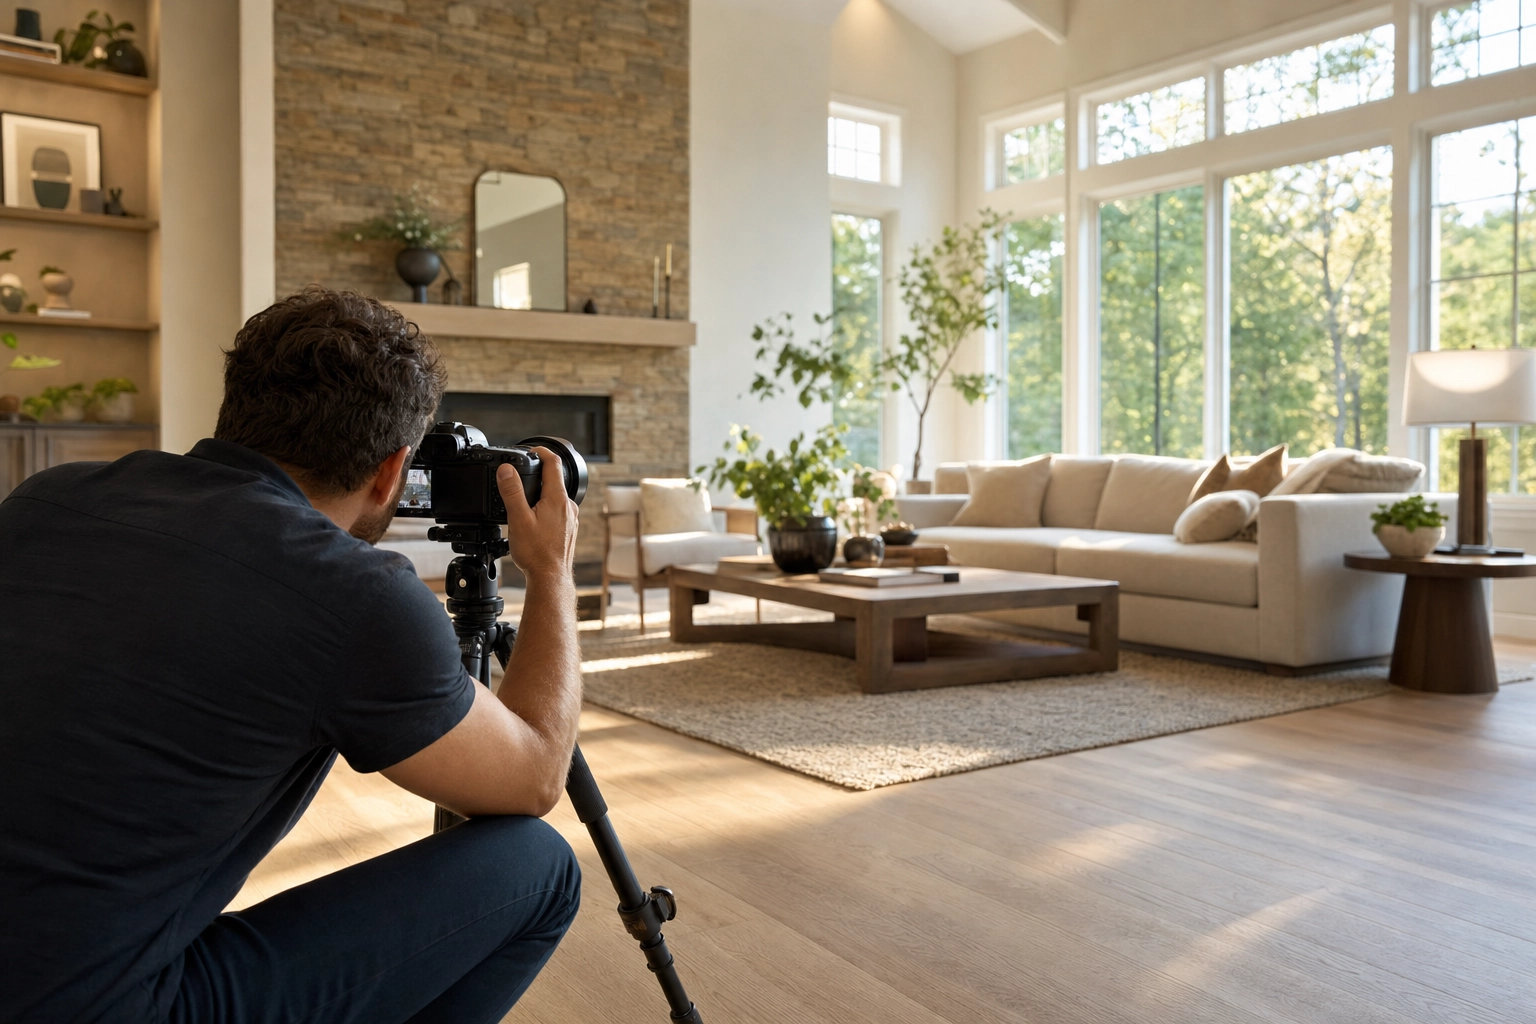
Part 1 — Prep the property before the shutter clicks
The biggest quality jump in real estate photography has nothing to do with your camera. It's the 30 minutes of prep before you take a single frame. A spotless, well-lit room shot on a phone will beat a cluttered room shot on a $4,000 body every time — and it protects your reputation and your business.
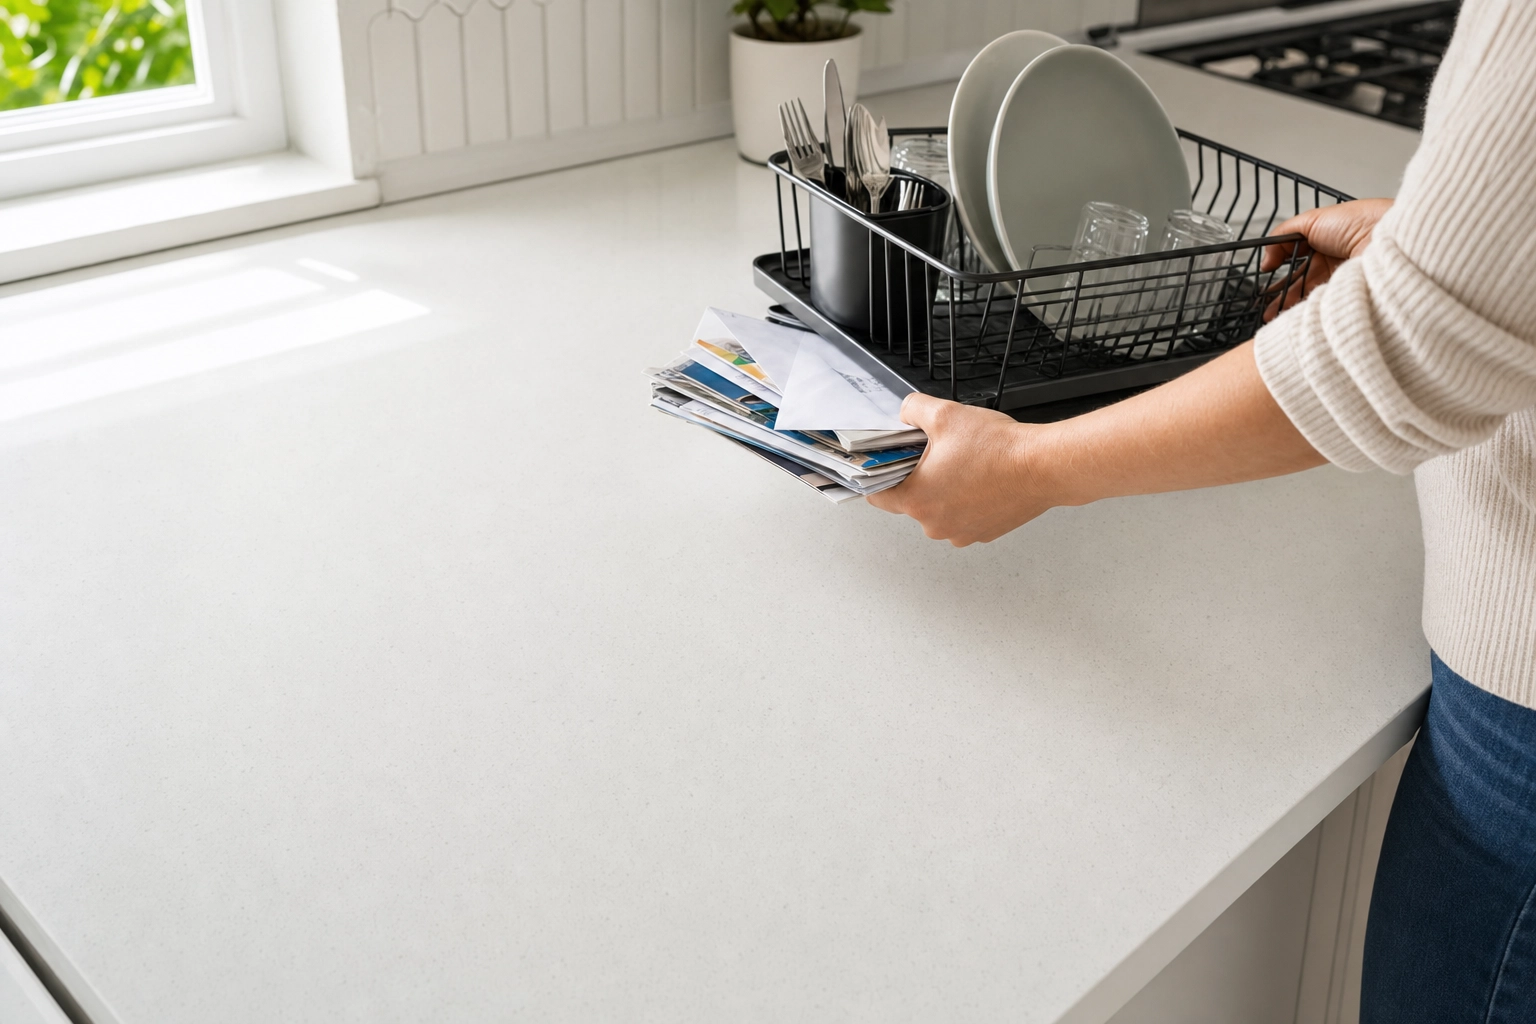
1. Declutter ruthlessly — the lens sees everything
Counters, coffee tables, and bathroom vanities are where listings go to die. Clear personal items, fridge magnets, charging cables, pet bowls, and the dish rack. Outside, move cars off the driveway, roll trash bins out of frame, and coil up the garden hose. A wide-angle lens captures far more of a room than your eye notices, so anything you leave behind ends up in the shot — and on Zillow forever, where it quietly costs you showings.
Perfect it in 90 seconds: Spot a stray bin, a parked car, or a power line after you're already home? Clutter Removal brushes it out and rebuilds the texture behind it, so you're not driving back for one object.
2. Stage with intent — and stage empty rooms virtually
Staging isn't fluff. The Real Estate Staging Association reports staged listings routinely selling several percent over asking, and NAR found 82% of buyers' agents say staging helps clients picture themselves in the home. Make every room's purpose obvious: a bed in the bedroom, a reading chair in the empty corner, towels squared on the rail, lids down, blinds open.
Perfect it in 90 seconds: Shooting a vacant unit? Virtual Staging adds furniture in seven styles with realistic scale and shadows — and it never moves a wall or invents a window. Just disclose it on the MLS (here are the state-by-state disclosure rules).
3. Turn on every light and match your bulbs
Switch on every lamp, overhead, and under-cabinet light in the house, then walk through and swap any mismatched bulbs. A room lit by one warm 2700K lamp and one cool 5000K daylight bulb photographs with ugly color casts — half the wall goes orange, half goes blue. Pick one color temperature per home and commit to it.
Perfect it in 90 seconds: Mixed lighting still sneaks through on most shoots. Auto Enhance corrects white balance, exposure, and color so whites read white instead of nicotine-yellow.
4. Clean what the lens sees
Mirrors, glass shower doors, stainless appliances, faucets, and black TV screens are smudge magnets — and at 4K, every fingerprint shows. Keep glass cleaner and a microfiber cloth in your kit. While you're at it, check for your own reflection in mirrors and shiny ovens before you press the shutter; nothing says "amateur" like the photographer crouching in the bathroom mirror.
5. Chase the right light — time of day and weather
For interiors, shoot when the sun is high and even (late morning to mid-afternoon) or on a bright overcast day, when soft light fills rooms without harsh window beams. For exteriors, shoot when the sun is actually hitting the front of the house — a north-facing facade at noon stays in shadow all day. Scout which direction the home faces before you book the time.
Perfect it in 90 seconds: Stuck with a flat gray sky or a daytime-only window? Sky Swap drops in a natural blue sky with matched color grading, and Day to Dusk turns a clean daytime exterior into warm twilight — no return trip required.
Part 2 — Set up the camera the right way
Gear matters less than people think, but a few setup habits separate clean, professional frames from wobbly, leaning ones. These are the backbone of real estate photography for beginners and seasoned pros alike.
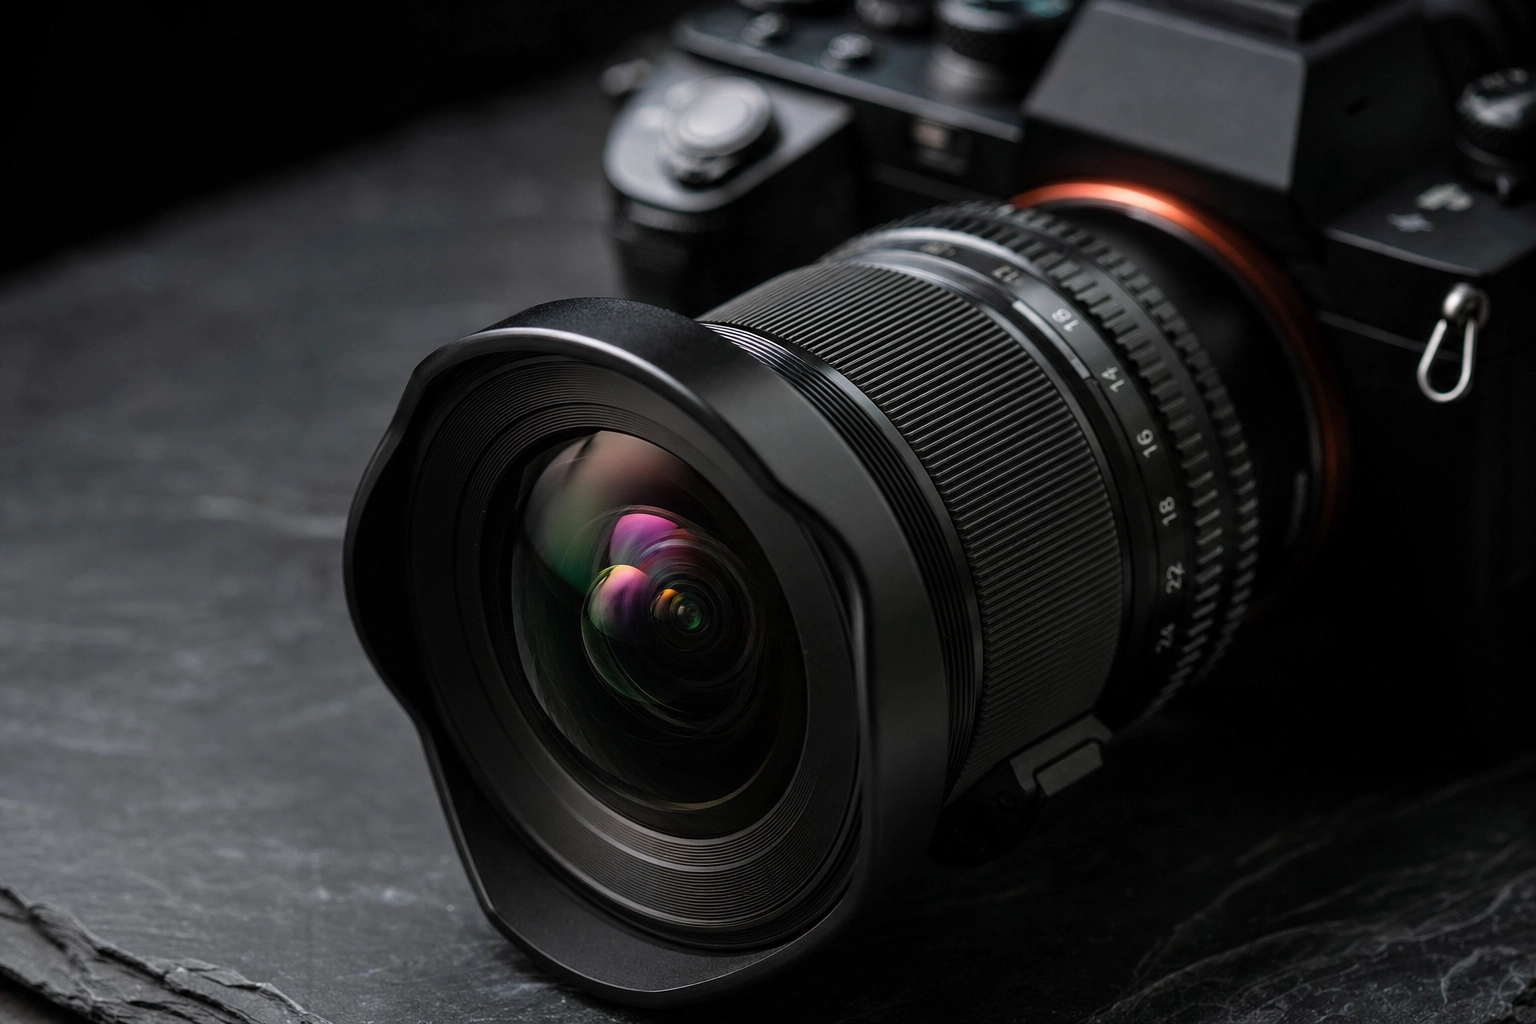
6. Go wide — but not too wide
A wide-angle lens lets you capture a whole room, but there's a sweet spot. On a full-frame camera, 16–24mm covers most interiors; on a crop sensor, think 10–16mm. Resist the urge to shoot at the very widest setting. NAR's own guidance warns that over-wide shots make small rooms "look like the size of a football field," distort proportions, and disappoint buyers the moment they walk in. Shoot wide enough to show the space, not so wide that you're selling a lie.
Perfect it in 90 seconds: A slightly tilted wide lens makes walls and door frames lean. Perspective Fix straightens those verticals automatically, so the room looks square without you re-shooting.
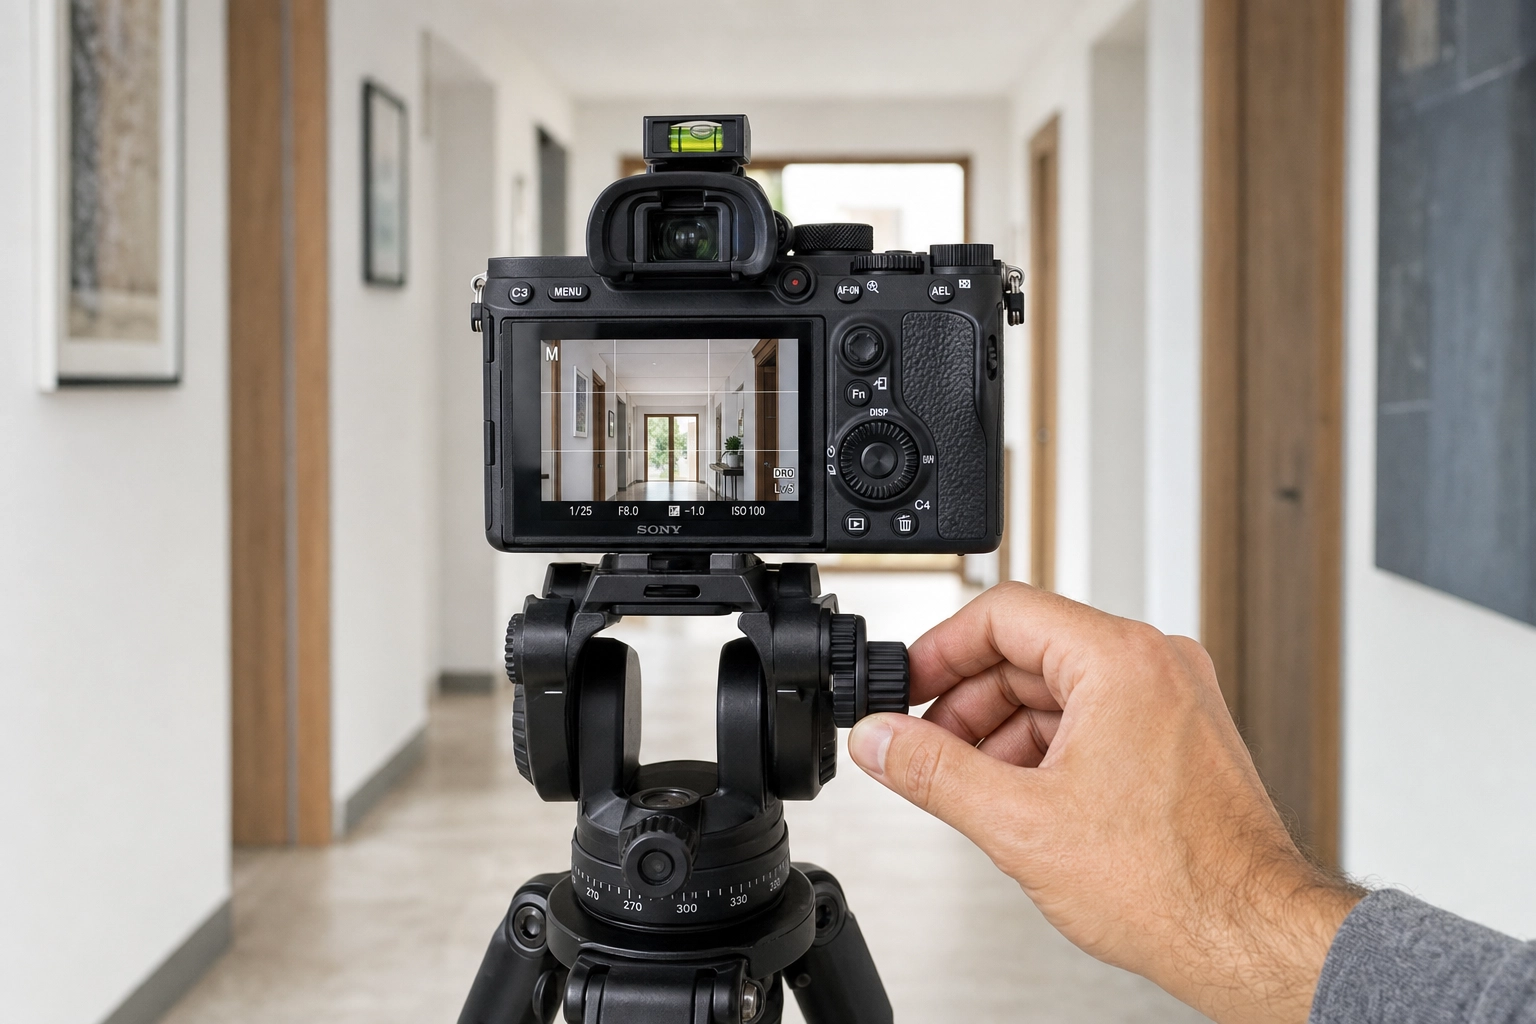
7. Lock it on a tripod
A tripod is the cheapest upgrade to your photos. It lets you drop to a low ISO for crisp, noise-free frames, holds a consistent height across every room, and — critically — keeps the camera dead still so you can shoot the bracketed exposures that tame bright windows. Remember that Redfin sharpness finding: the sharpest 10% of photos sold at or above list 44% of the time, more than three times the rate of average-sharpness photos. Sharp sells.
8. Shoot at chest height (48–52 inches)
Camera height quietly makes or breaks a room. Set your tripod so the lens sits around 48–52 inches off the floor — roughly chest height. Too high and you stare down at a sea of floor and tabletops; too low and you get acres of ceiling with furniture legs poking up. For kitchens and bathrooms, drop a little lower to around counter height so the countertops read as surfaces, not horizons.
9. Level the camera — keep verticals true
This is the single biggest tell of a pro versus an amateur shot. When the camera tilts up or down, vertical lines — door frames, wall corners, cabinets — fan out or lean in, and the whole room looks like it's falling over. Use your camera's two-axis electronic level (or a hot-shoe bubble level) and get both axes to zero before every frame.
Perfect it in 90 seconds: Handheld a few frames and they came out leaning? Perspective Fix re-squares the verticals and horizon automatically — the same correction architectural photographers used to spend minutes on per image.
Part 3 — Compose like a pro
Composition is how you turn "a photo of a room" into "a room someone wants to live in." Master these real estate photography composition rules and your interiors start selling themselves.
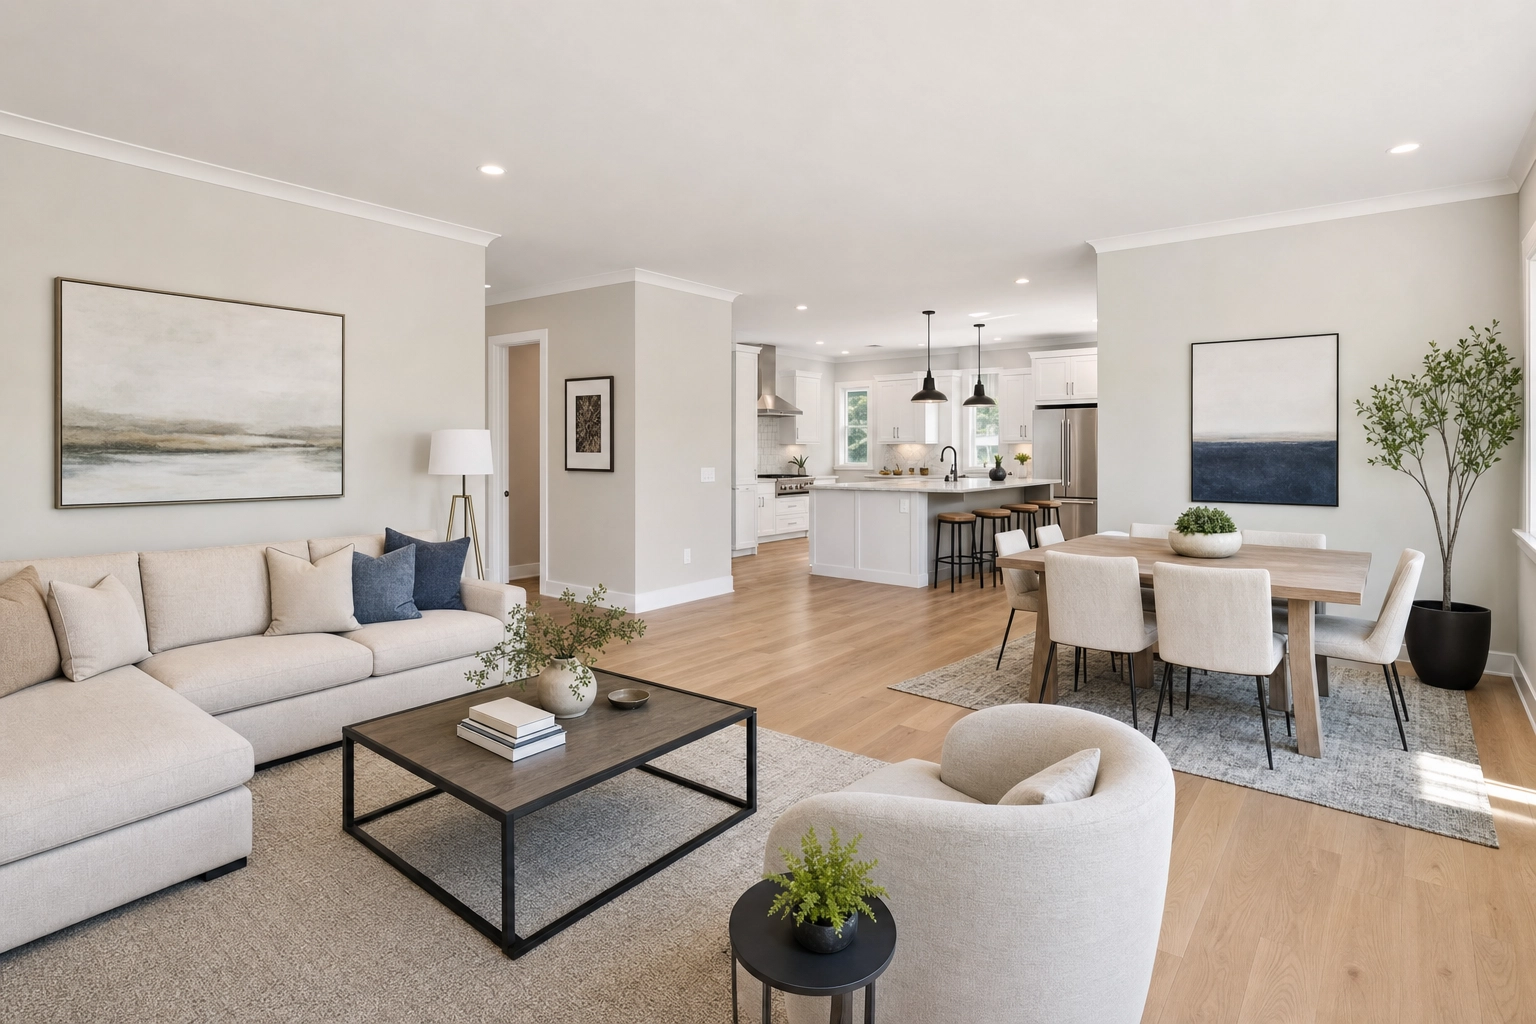
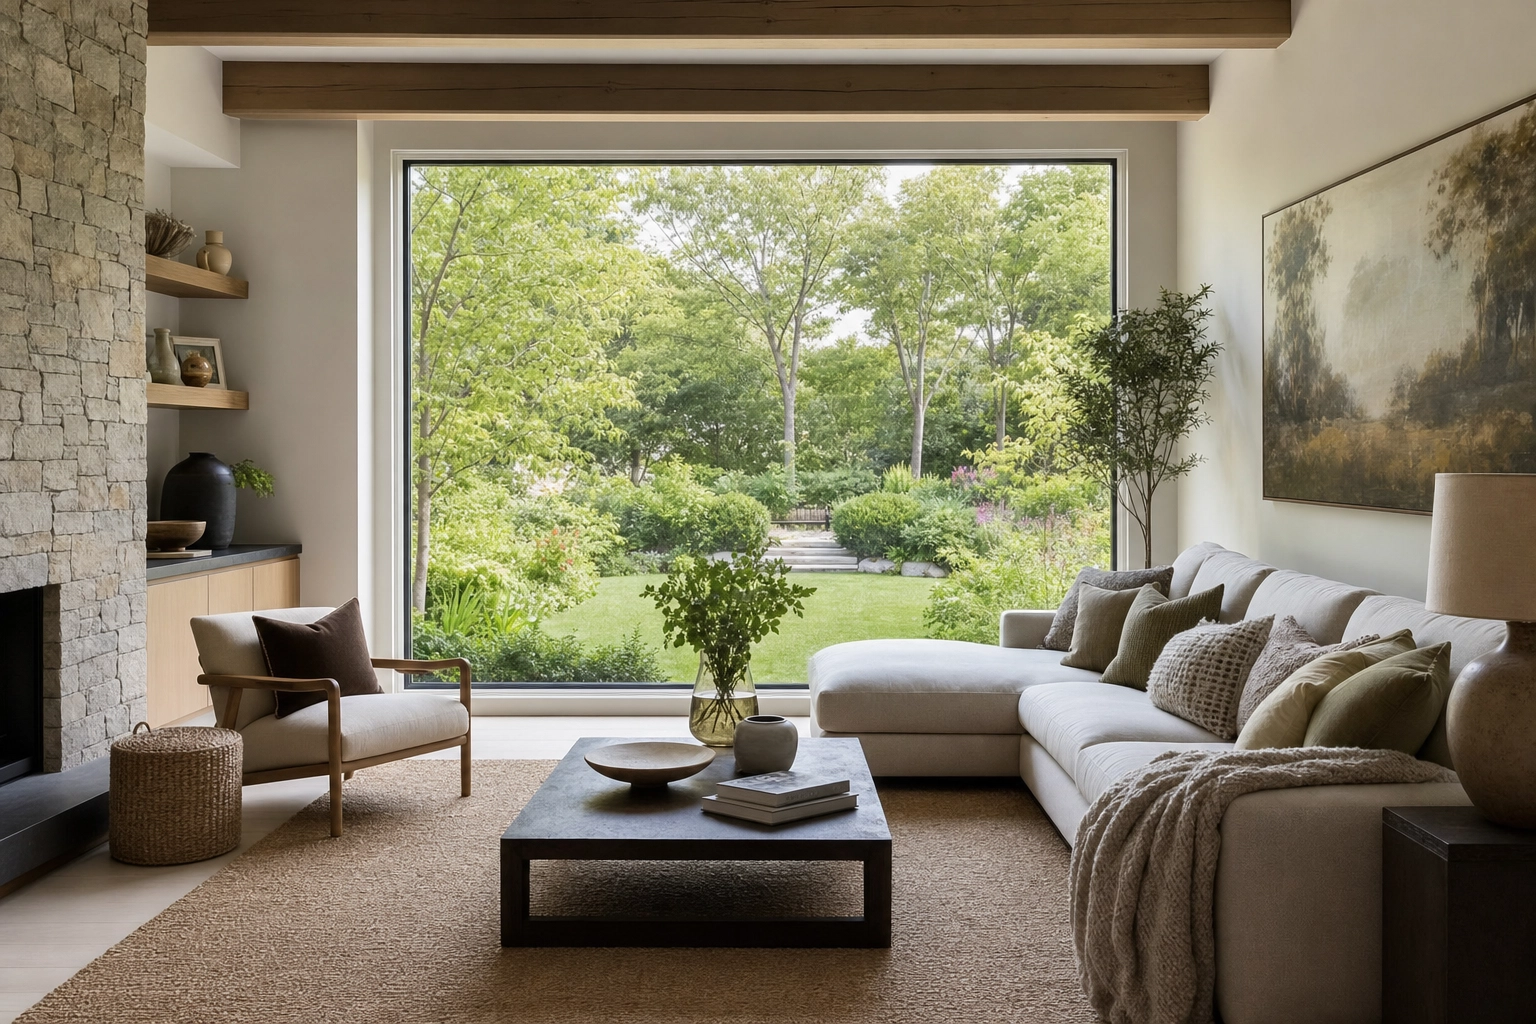
10. Use the 3-wall rule
Stand in or near a corner and frame the room so three walls are visible. This is the workhorse composition for residential listings because it shows size, layout, and flow in one glance — buyers instantly understand how the space connects. Shoot at roughly a 45-degree angle into the room rather than flat against one wall.
One honest caveat: trained architectural photographers often prefer cleaner two-wall, one-point framing for a more formal look. Both are correct. For everyday listings where the goal is "make the space feel open and understandable," the 3-wall rule wins.
11. Apply the 20-60-20 rule
A well-balanced interior frame is roughly 20% ceiling, 60% walls and furnishings, and 20% floor. That ratio gives a room a natural, spacious feel without dead space up top or a runway of empty floor at the bottom. The good news: when your camera is level at chest height, the 20-60-20 split tends to happen on its own. If you're seeing way more ceiling or floor than that, adjust your height before you adjust anything else.
12. Keep verticals dead straight (one- vs two-point perspective)
There are two clean ways to shoot a room. One-point perspective means squaring the camera perpendicular to the back wall, so lines run straight to a single vanishing point — formal and symmetrical. Two-point perspective is your 45-degree corner shot, with lines receding to two points. Either works, but both depend on the same thing: dead-level verticals.
Perfect it in 90 seconds: If a vertical still leans after the fact, Perspective Fix corrects it without stretching the room or distorting proportions.
13. Shoot every room from two angles and build depth
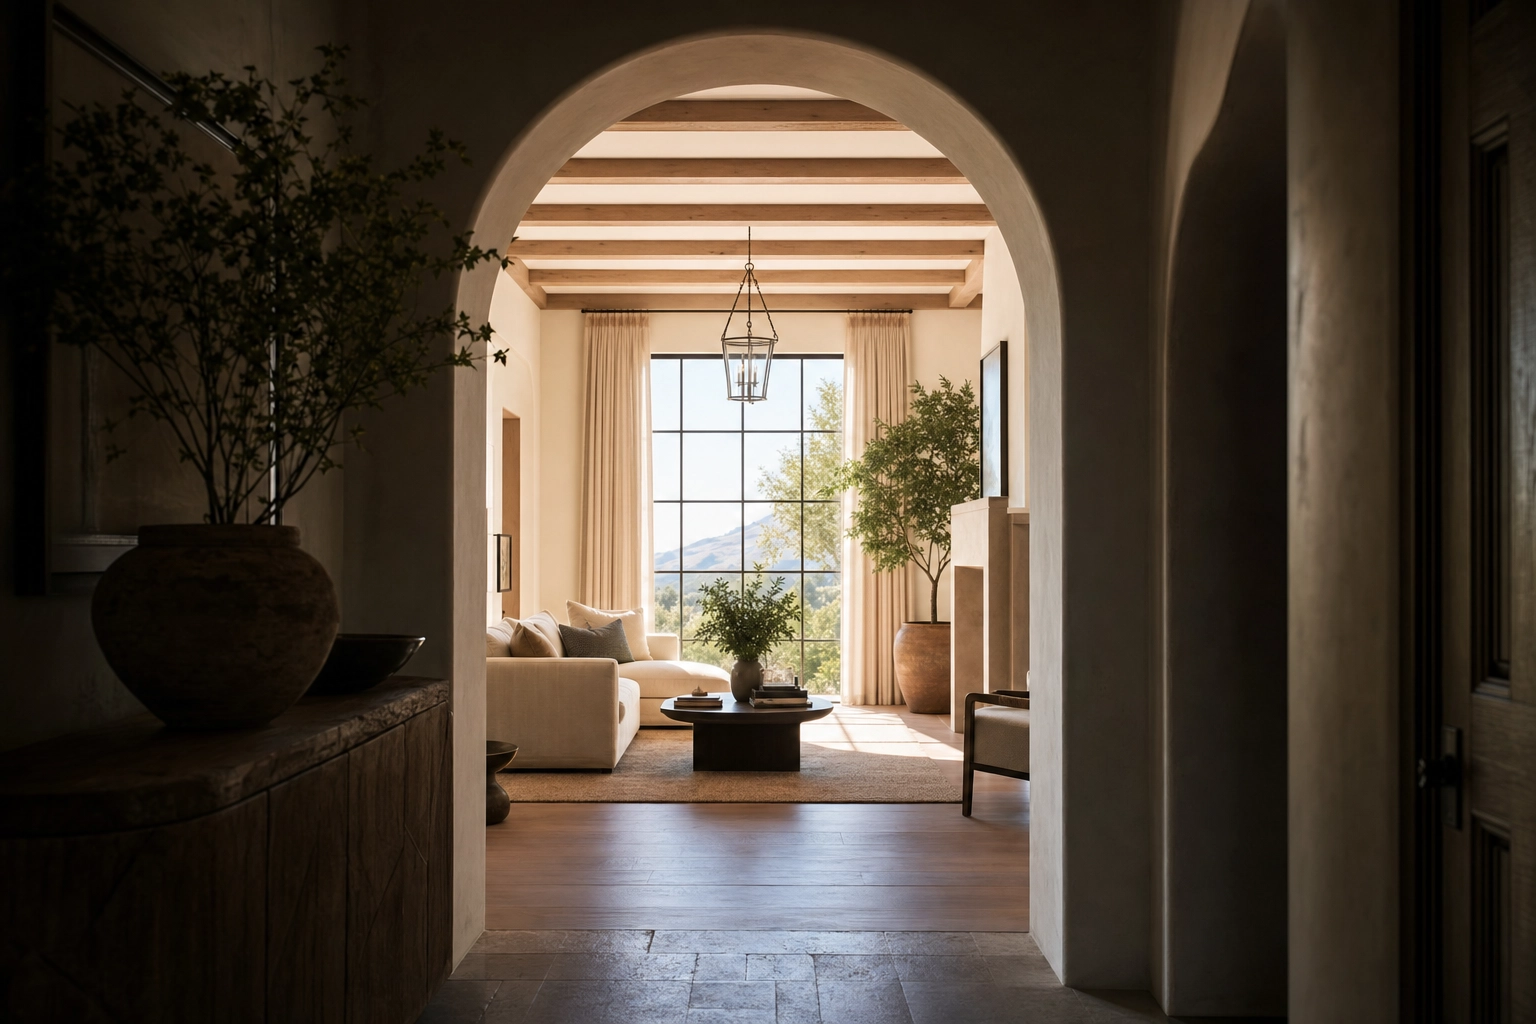
Don't settle for one frame per room. Shoot each space from two opposing corners — "looking in" and "looking out" — so buyers see the full picture. Add depth by composing through doorways and openings: a foreground frame (a doorway, an archway) leading to a background room makes a flat photo feel three-dimensional and helps the eye travel through the home.
14. Don't lie with the lens
The fastest way to lose a buyer's trust is a photo that oversells. Stretching a tiny bedroom into a suite with an ultra-wide lens, or hiding the busy road just out of frame, gets the showing — and then the disappointment. Honest framing protects your reputation and the seller's. Edit to present the home at its best, not to misrepresent what's actually there; that line is exactly why structure-preserving editing matters more than "AI magic."
Part 4 — Master light and exposure
Light is the hardest skill in real estate photography and the one that pays off most. Master these four and your interiors stop looking flat.
15. Bracket for bright windows
The classic real estate problem: expose for the room and the windows blow out to white; expose for the windows and the room goes black. The fix is bracketing — shoot the same frame at several exposures (a base, plus shots at roughly ±2 EV) and blend them so you keep both a bright room and the view outside. On a tripod, three to five brackets cover almost any room.
Perfect it in 90 seconds: If you shot a single frame and the exposure or color is slightly off, Auto Enhance recovers exposure, color, and clarity. It won't invent a view that wasn't captured — it preserves what's actually outside the glass.
16. Try a simple two-flash (flambient) setup
"Flambient" blends flash with ambient light, and it's how a lot of pros get clean, even interiors. The simple version: set a base ambient exposure, then add one or two off-camera flashes bounced off a white ceiling or wall. Bounced flash fills shadows and neutralizes the color casts from mismatched household bulbs, giving you natural, magazine-clean light without the muddy look of straight HDR.
Perfect it in 90 seconds: No flashes in your bag yet? Auto Enhance cleans up color casts and evens out exposure so even an ambient-only frame reads bright and true.
17. Nail white balance — one color temperature per room
Leave your camera on Auto White Balance and it will guess differently from frame to frame, so your gallery becomes a patchwork of warm and cool rooms. Set a fixed Kelvin value (or shoot a gray card) so the whole house matches. Consistent color is what makes a set of photos look like one professional shoot instead of twenty random snapshots.
Perfect it in 90 seconds: Auto Enhance neutralizes color casts and matches white balance across a set, so every room shares the same clean, accurate base.
18. Protect your highlights and shoot RAW
Once a white wall, ceiling, or window clips to pure white, the detail is gone for good — you can't recover what the sensor never recorded. Watch your histogram and keep the highlights just below clipping. Shooting in RAW gives you far more latitude to pull back bright areas and lift shadows afterward than JPEG ever will.
Perfect it in 90 seconds: Slightly hot or flat frames are an easy fix — Auto Enhance balances exposure and clarity across the shot while keeping the look natural.
Part 5 — Exteriors and the finish
The exterior is the thumbnail — the one photo that decides whether anyone opens the listing at all.
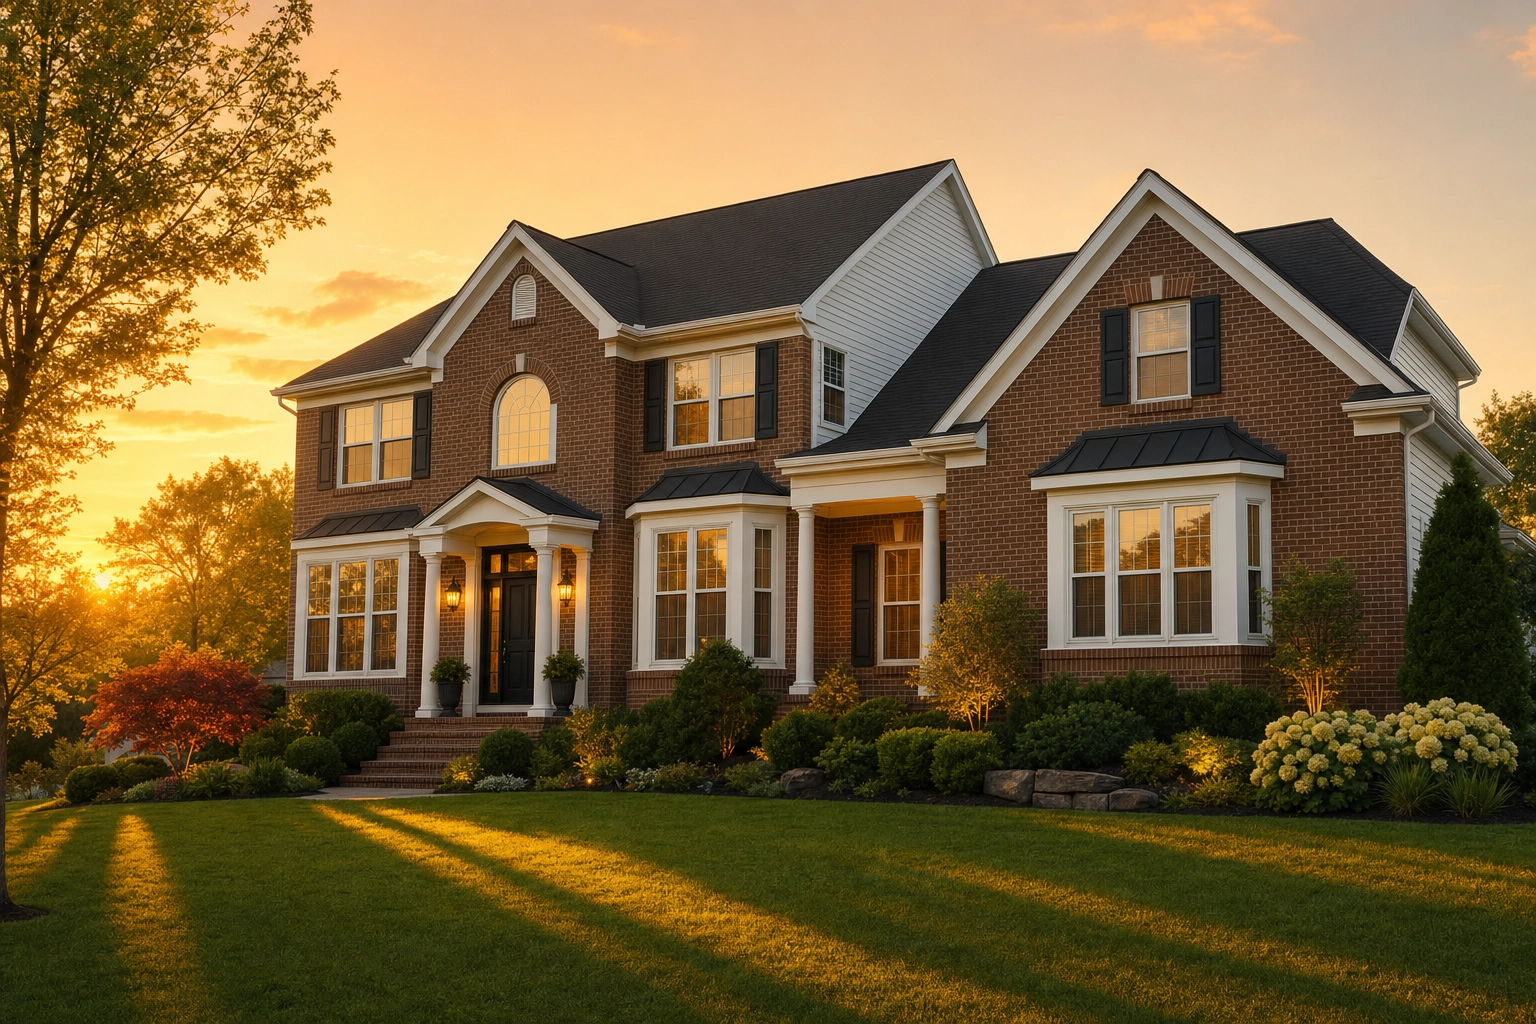
19. Make the exterior shine — sun on the facade, clean curb
Shoot the front when the sun is on it, not behind it. Square up to the facade or take a gentle three-quarter angle to show depth, and keep your verticals straight here too. Clear the curb first: cars off the driveway, bins away, hoses coiled, toys and signs gone. A clean, well-lit exterior with a blue sky and green lawn is the single most important frame in the set.
Perfect it in 90 seconds: Gray sky or patchy yard on shoot day? Sky Swap gives you a believable blue sky, and Lawn & Pool Revive greens up tired grass and clears cloudy pool water — without touching the house itself.
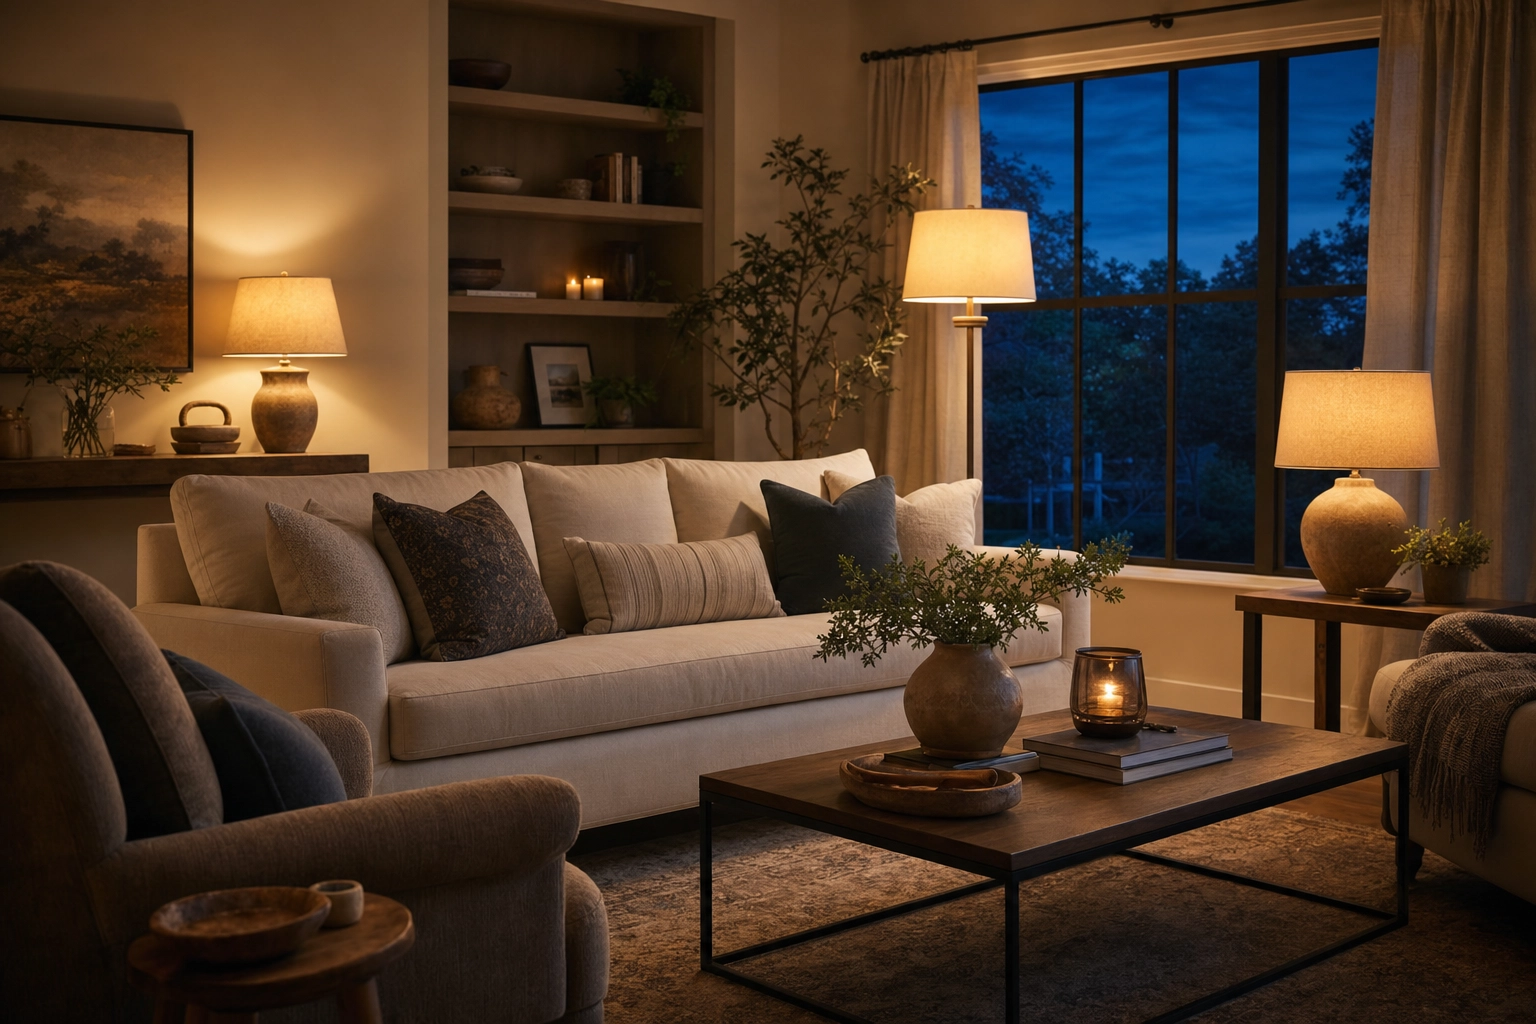
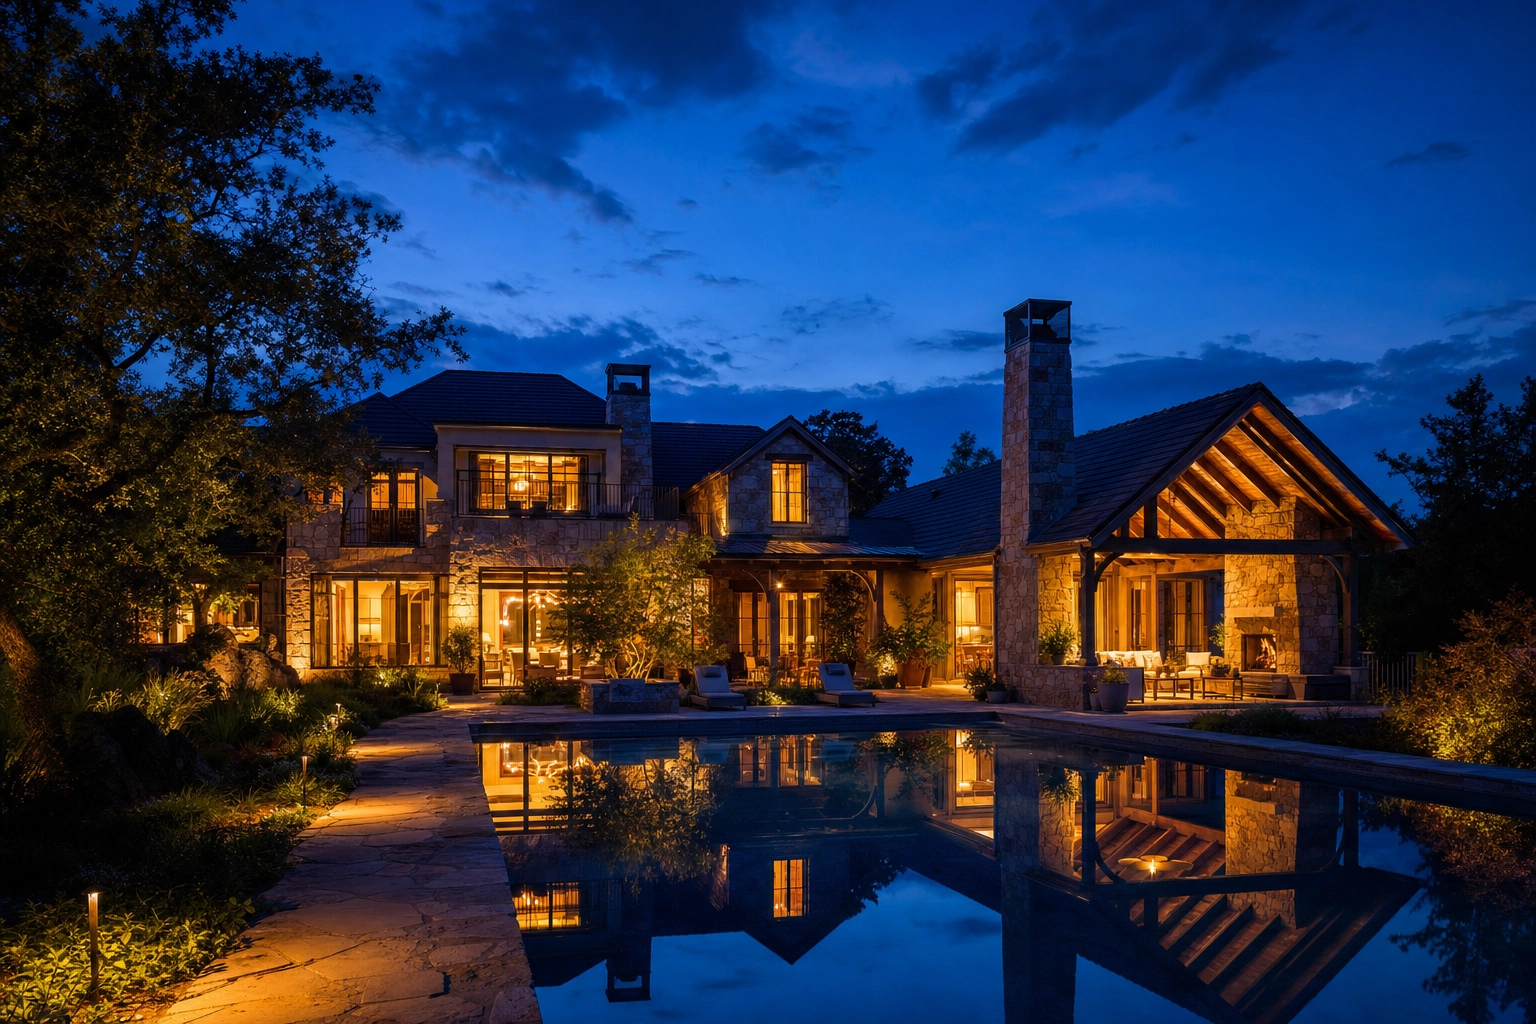
20. Add a twilight hero shot
Twilight (or "dusk") exteriors are the highest-converting cover photos in real estate. Shot during blue hour — roughly 20 to 30 minutes after sunset — with the interior lights glowing warm against a deep blue sky, a home looks aspirational and expensive. The catch is that blue hour lasts only minutes, and you can't always be there for it.
Perfect it in 90 seconds: Shoot a clean daytime exterior and let Day to Dusk convert it to twilight with warm window glow and a graded sky. Here's the science behind why twilight shots close listings.
21. Edit consistently, disclose, and deliver fast
A great gallery looks like one shoot, not twenty. Lock a single white balance and color grade across the whole set so every room feels cohesive. Be honest about what you change — Plotpane writes invisible XMP disclosure metadata onto staged output (though you still add the listing-remarks note yourself). And deliver fast: in a market where listings go live in hours, the editor who turns a full set around the same day wins the repeat business and referrals that build a photography business.
Perfect it in 90 seconds: Instead of stacking brackets and straightening walls one image at a time, run the whole set through a single pipeline — enhance, straighten, swap skies, revive lawns, remove clutter, and stage — and get watermark-free 4K back in about 90 seconds per image, with the grade locked across the batch.
Frequently Asked Questions
What is the 3-wall rule in real estate photography?
The 3-wall rule means positioning your camera in or near a corner so that three of the room's walls are visible in the frame, usually shooting at about a 45-degree angle. It gives buyers the clearest sense of a room's size, layout, and flow in a single image, which is why it's the default composition for residential listings. It helps the viewer understand how the space connects before they ever step inside.
What camera height should you use for real estate photos?
Shoot most interior rooms at chest height — roughly 48 to 52 inches off the floor. That height produces a natural perspective and the balanced 20-60-20 ceiling-wall-floor split. Drop a little lower (closer to counter height) for kitchens and bathrooms so countertops read as surfaces rather than high horizons.
What are the best camera settings for real estate photography?
A reliable starting point is aperture around f/7.1 to f/9 for front-to-back sharpness, ISO 100–400 to keep noise down, and a slow shutter on a tripod to let in enough light. Shoot in RAW, use a 16–24mm full-frame (or 10–16mm crop) lens, and bracket your exposures for rooms with bright windows.
Can you take good real estate photos with a smartphone?
Yes — modern phones are a great entry point and a budget-friendly way to start a real estate photography business. Mount the phone on a small tripod, turn on the grid and level guides, tap to lock exposure, enable HDR for bright windows, and wipe the lens. The same rules apply: chest height, level verticals, declutter first. Then enhance exposure and straightening afterward to lift the results closer to DSLR quality.
How do you fix dark rooms and blown-out windows in listing photos?
In camera, the fix is bracketing (blending several exposures) or adding bounced flash so the room and the window are both properly lit. After the shoot, Auto Enhance can recover exposure, color, and clarity on frames that are slightly off — while preserving the real view through the glass rather than inventing one.
How many photos should a real estate listing have?
For a typical single-family home, aim for roughly 25 to 40 images covering every room, key features, and the exterior from a couple of angles. Listings with more high-quality photos consistently attract more views, so don't skimp — just make sure every frame is sharp and adds information rather than padding.
Is it OK to enhance or edit MLS listing photos?
Yes, as long as the edit is honest and structure-preserving. Correcting exposure, white balance, leaning verticals, skies, and lawns is standard and accepted. What you must not do is misrepresent the property — adding or removing permanent features, or hiding real defects. When you virtually stage or make a material change, disclose it; see the MLS virtual staging disclosure rules for your state.
Put these real estate photography tips to work
Master these 21 real estate photography tips and you'll capture frames that already look professional. But even the best shooters bracket imperfectly, catch a gray sky, or miss a bin in the driveway — and re-shooting costs hours you don't have.
That's the workflow Plotpane is built for: nail the shot in camera, then run the set through one structure-preserving pipeline that enhances exposure, straightens verticals, swaps skies, revives lawns, removes clutter, and stages vacant rooms — watermark-free 4K, in about 90 seconds an image, without ever reinventing the property. It's the fast finish behind a lot of the listing galleries real estate photographers deliver today, and it helps a small team move like a big studio.
There's no free trial and no free plan — but there's a 14-day refund, so you can run real listings through it risk-free. Plans start at $49/month. See pricing or learn what photographers charge per shoot to see how fast the math works in your favor.