Real Estate Photography Equipment: 2026 Gear Guide
By Marcus Vela, Real Estate Imaging Lead at Plotpane · Published June 4, 2026 · Updated June 4, 2026 · 11 min read
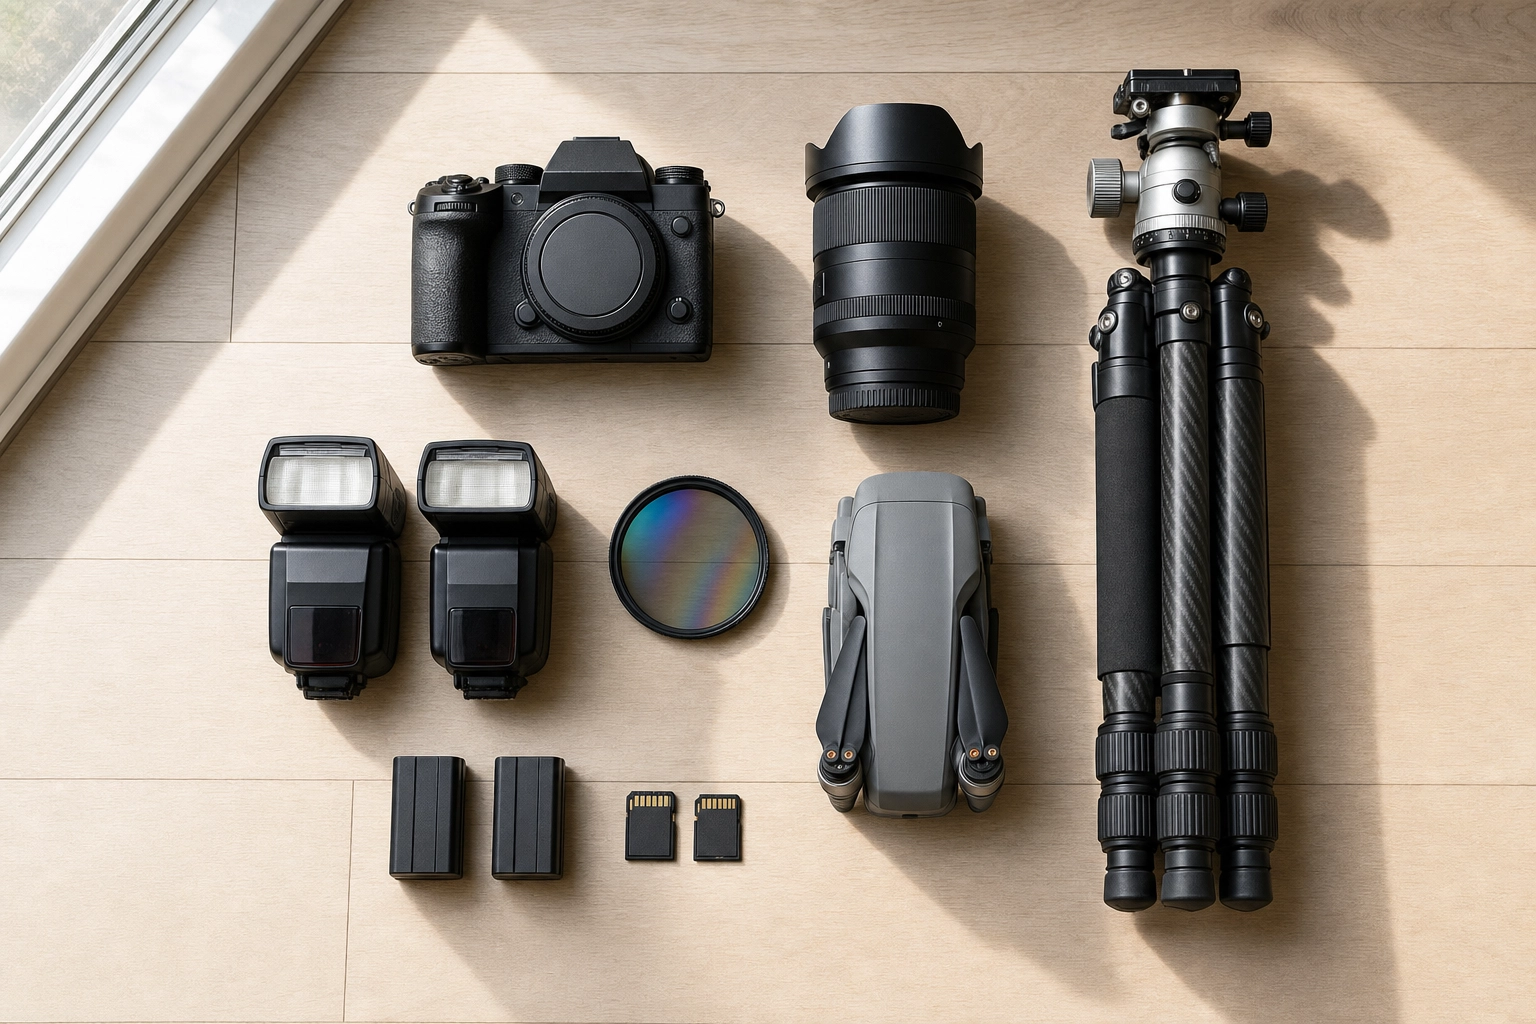
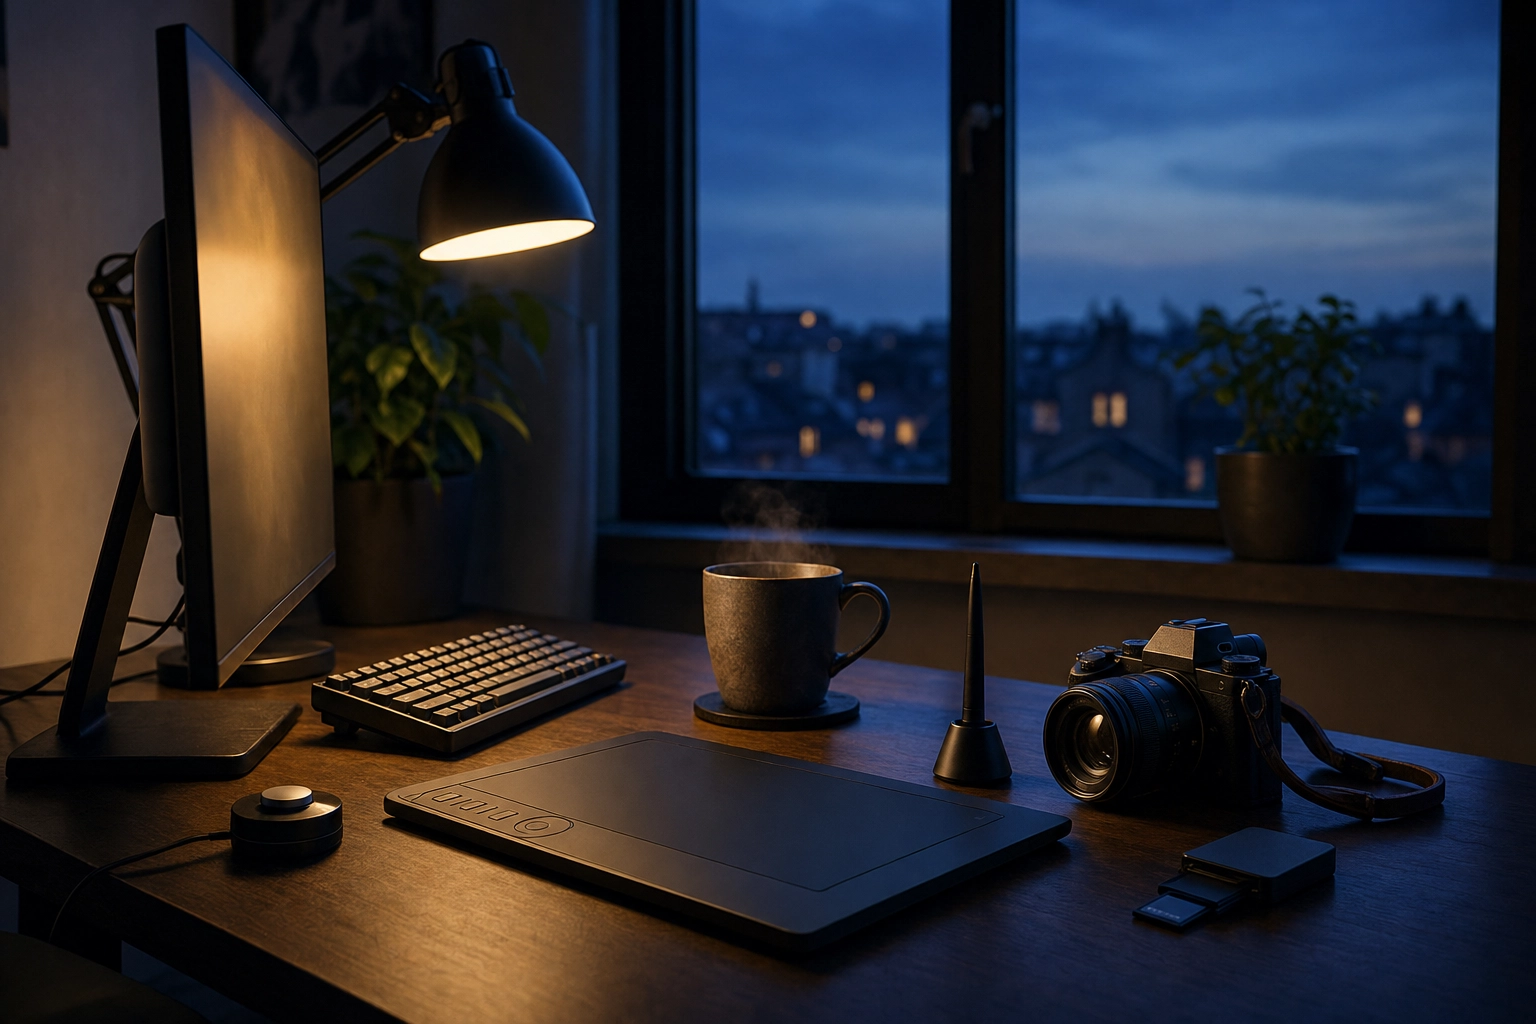
The right real estate photography equipment comes down to six things: a full-frame mirrorless camera, a wide-angle zoom (16–35mm or 14–24mm), a sturdy tripod with a geared head, two off-camera flashes with triggers, a circular polarizer, and a drone for aerials. Add a fast post-shoot editing pipeline and you can shoot, straighten, and deliver a full listing without your gear ever becoming the bottleneck.
You can assemble a capable starter kit for around $1,500–$2,500. A full working-pro setup runs closer to $5,000–$8,000. The good news: you don't need the expensive version to take photos that sell. You need the right pieces, in the right order, used well.
This guide walks through every category — what to buy, what to skip, and where budget gear is genuinely "good enough" versus where it quietly costs you. Think of your real estate photography gear as a production system, not a trophy shelf. Every item should earn its place by making you faster, making the photo better, or making you money.
Quick Summary: A working real estate photography kit is a full-frame mirrorless body, a 16–35mm wide-angle zoom, a carbon-fiber tripod with a geared head, two off-camera flashes, a circular polarizer, and — when the property calls for it — a drone. Budget kits start near $1,500; pro kits reach $8,000. The highest-ROI upgrade for most shooters in 2026 isn't more hardware. It's a faster editing pipeline.
Does the gear actually move the needle? The data says yes — with a caveat
Good photos aren't decoration; they're the listing's first showing. Redfin's well-known photography study found that homes shot professionally with a DSLR sold for $3,400 to $11,200 more than comparable homes photographed with point-and-shoot cameras, and were viewed about 61% more often online. The National Association of Realtors has long found that listing photos are the most useful feature in a buyer's online search — the thing they lean on first when deciding which homes are worth their time.
Here's the caveat nobody selling cameras wants to say out loud: gear does not guarantee good photos. A $3,500 body won't fix blown-out windows, crooked verticals, or a dark, flat kitchen. Lighting, composition, straight lines, and editing decide whether a photo works — and all four are mostly skill, not spec sheets.
So buy equipment that solves your most common problems first. Can't fit the room in the frame? That's a lens problem. Walls leaning like a funhouse? That's a tripod-and-head problem. Murky kitchen? That's a flash problem. Match each purchase to a real pain point and you'll never waste money on gear you don't use.
The complete real estate photography equipment list: budget vs pro
Here's the complete real estate photography equipment list in one view, with an honest budget pick and a pro pick for each category. Figures are approximate early-2026 street prices and shift constantly, so confirm current pricing before you buy.
| Category | Budget pick | Pro pick | Rough price (budget → pro) |
|---|---|---|---|
| Camera body | Used full-frame or modern APS-C | New full-frame mirrorless | $700 → $2,500+ |
| Wide-angle lens | f/4 wide zoom | f/2.8 wide zoom or tilt-shift | $500 → $2,300 |
| Tripod + head | Aluminum legs + entry geared head | Carbon fiber + premium geared head | $250 → $1,200 |
| Lighting | One speedlite + trigger | Two speedlites or monolights | $200 → $1,400 |
| Circular polarizer | Standard CPL | Slim, multi-coated CPL | $50 → $150 |
| Drone | DJI Mini-class (sub-249g) | DJI Air-class (zoom camera) | $800 → $1,300 |
| Editing pipeline | Manual (Lightroom + Photoshop) | Automated AI pipeline | hours → a subscription |
You do not need the right-hand column to start. A used full-frame body, one wide zoom, a tripod with a geared head, and a single flash will cover the vast majority of residential shoots.
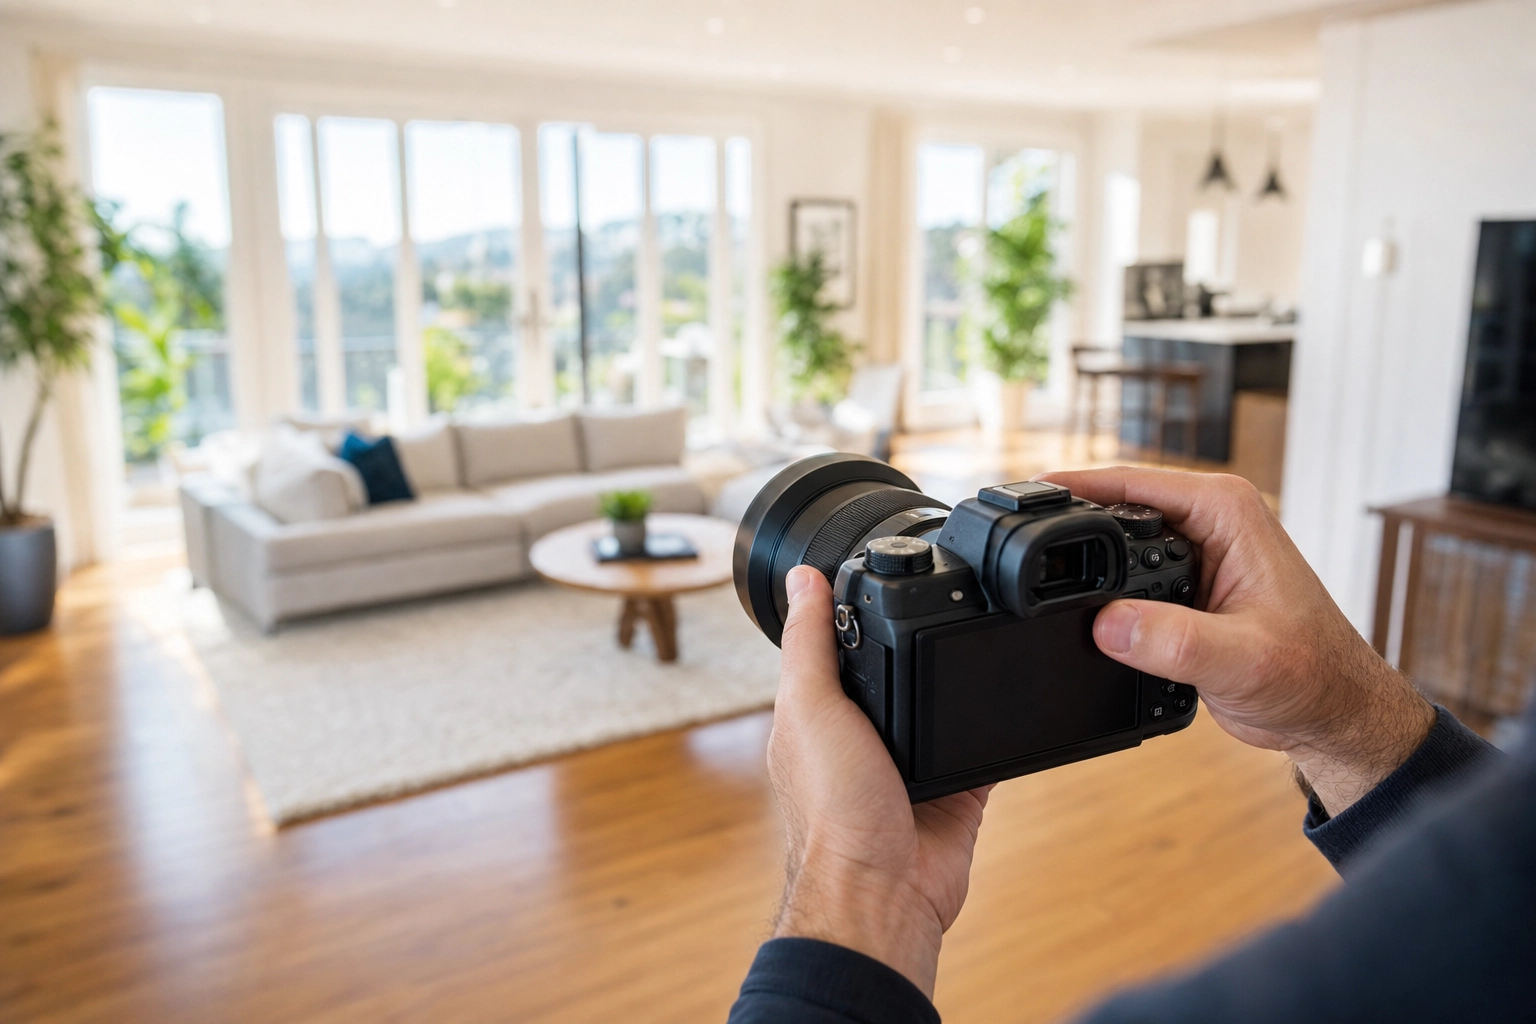
1. Camera body: full-frame mirrorless is the standard
For interiors, a full-frame mirrorless camera is the 2026 default — and for good reason. Full-frame sensors gather more light than APS-C, which matters in the dim corners where you can't always add flash. They also deliver wider dynamic range (so a bright window and a dark room can coexist in one HDR bracket), in-body image stabilization, fast autofocus, and dual card slots for backup on paid jobs.
The pro picks
Around $2,500 (body only), three cameras show up in working photographers' bags more than any others: the Sony A7 IV (33MP), the Canon EOS R6 Mark II (24MP), and the Nikon Z6 III (24.5MP). All three hold detail at higher ISO and shoot fast enough for back-to-back properties. Shooting luxury listings that get printed large or cropped hard? The 61MP Sony A7R V (around $3,900) gives you room to spare.
The budget path
You do not need the newest body. A used Sony a7 III or Canon EOS R delivers full-frame quality for under $1,500. If you'd rather buy new and save, a crop-sensor body like the Fujifilm X-T5 (40MP APS-C) or Canon R7 shoots excellent listing photos — just pair it with a matching wide lens.
One myth worth killing: megapixels barely matter here. 24MP is more than enough for the MLS, Zillow, and brokerage sites, where images are viewed on phones and laptops. Resolution is the last thing to optimize for. For a body-by-body breakdown across budgets and brands, see our deep dive on the best camera for real estate photography.
2. The wide-angle lens: your single most important purchase
If you only upgrade one thing, make it the glass. The lens shapes how rooms look more than any other piece of gear — and good glass holds its value far better than camera bodies do.
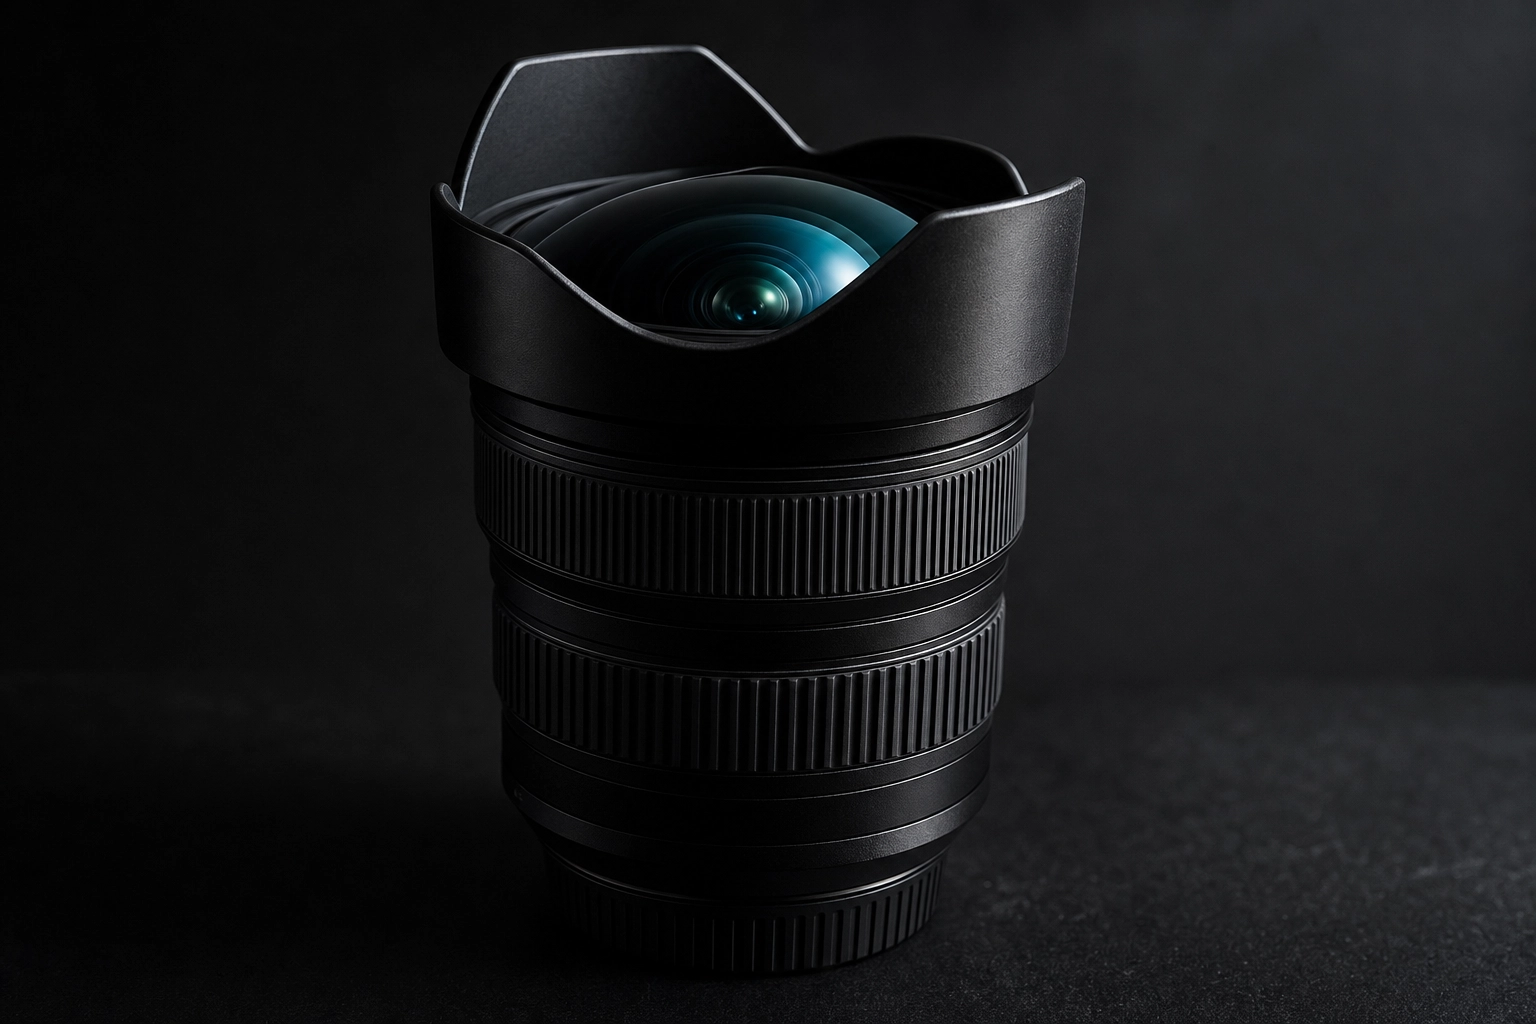
For full-frame, a 16–35mm zoom is the workhorse. The wide end (16mm) swallows open-plan kitchens and great rooms; the longer end (35mm) keeps smaller rooms and bathrooms looking natural. A constant-aperture 16–35mm f/4 is plenty for tripod work; the f/2.8 versions cost more and add weight you rarely need for stills. For genuinely tight spaces, a 14–24mm gives you extra breathing room. On APS-C bodies, the equivalent is a 10–18mm or 10–20mm.
How wide is too wide?
It's tempting to cram the whole room into one frame, but extreme wide angles stretch corners, bend lines, and make spaces look distorted and unnatural. Worse, an exaggerated room can stray into MLS misrepresentation territory. Most of the time, 16–24mm (full-frame) is the honest, flattering sweet spot.
For high-end architectural and commercial work, a tilt-shift lens (like a 24mm TS-E) corrects converging verticals in-camera and saves real editing time — but at roughly $2,000–$2,500, it's a pro-tier purchase. A 50mm prime is a cheap, sharp option for detail shots: fireplaces, fixtures, and staging vignettes. So, to answer the question everyone asks first — what lens for real estate photography? For the vast majority of residential shooters, a single 16–35mm (or its APS-C equivalent) is all you need to start.
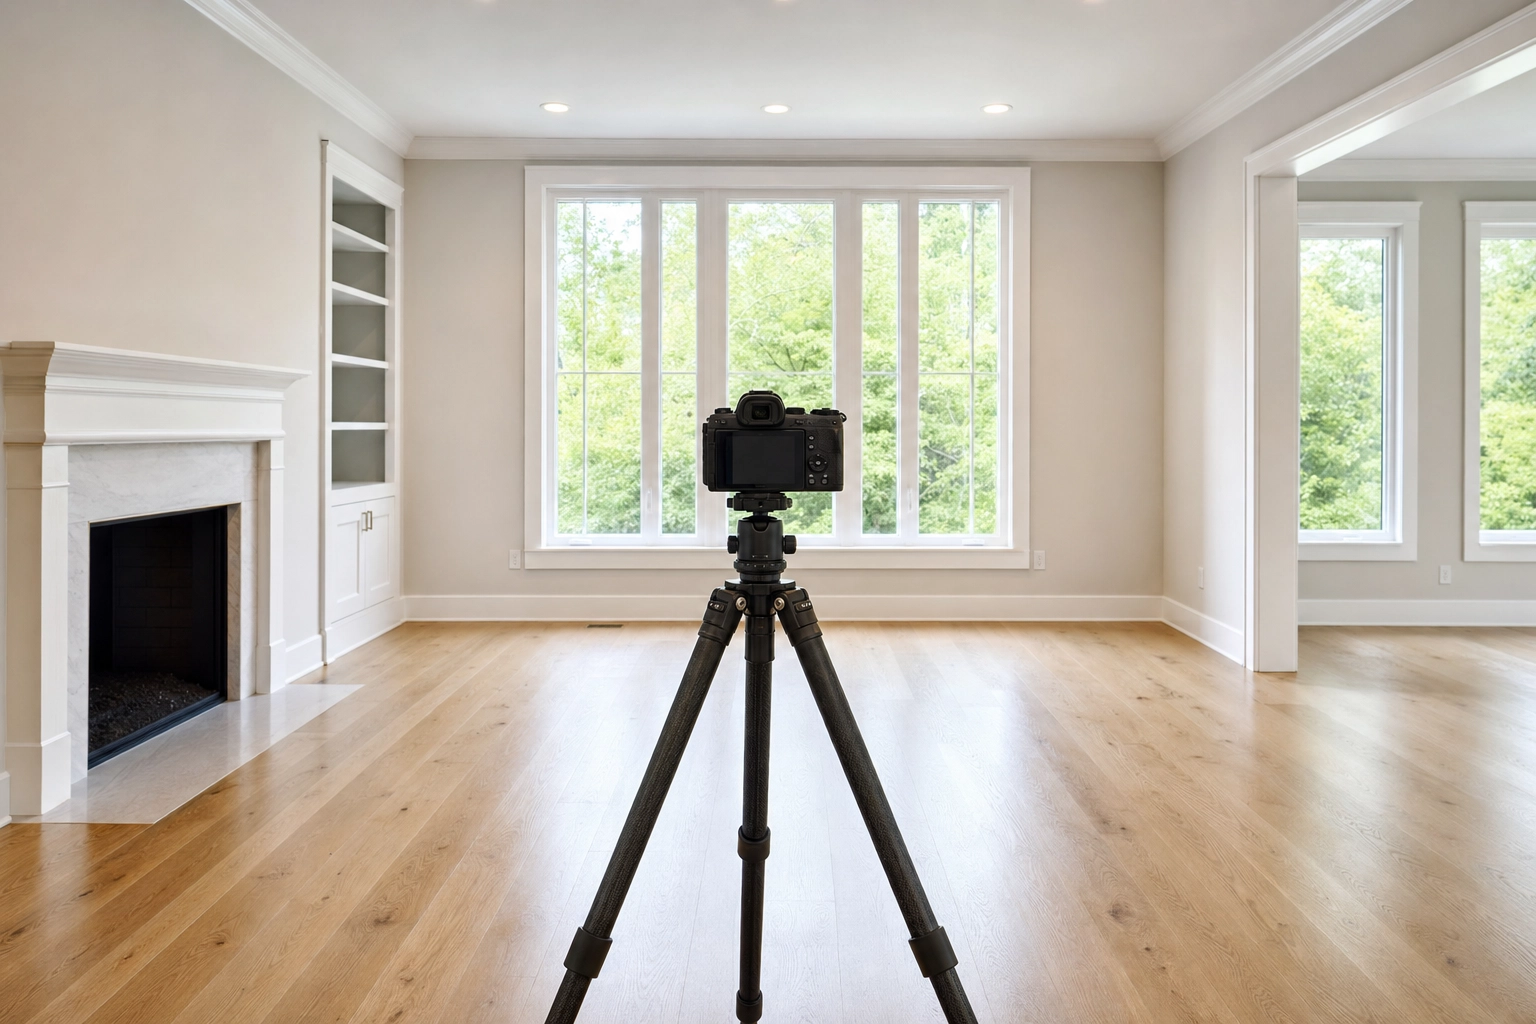
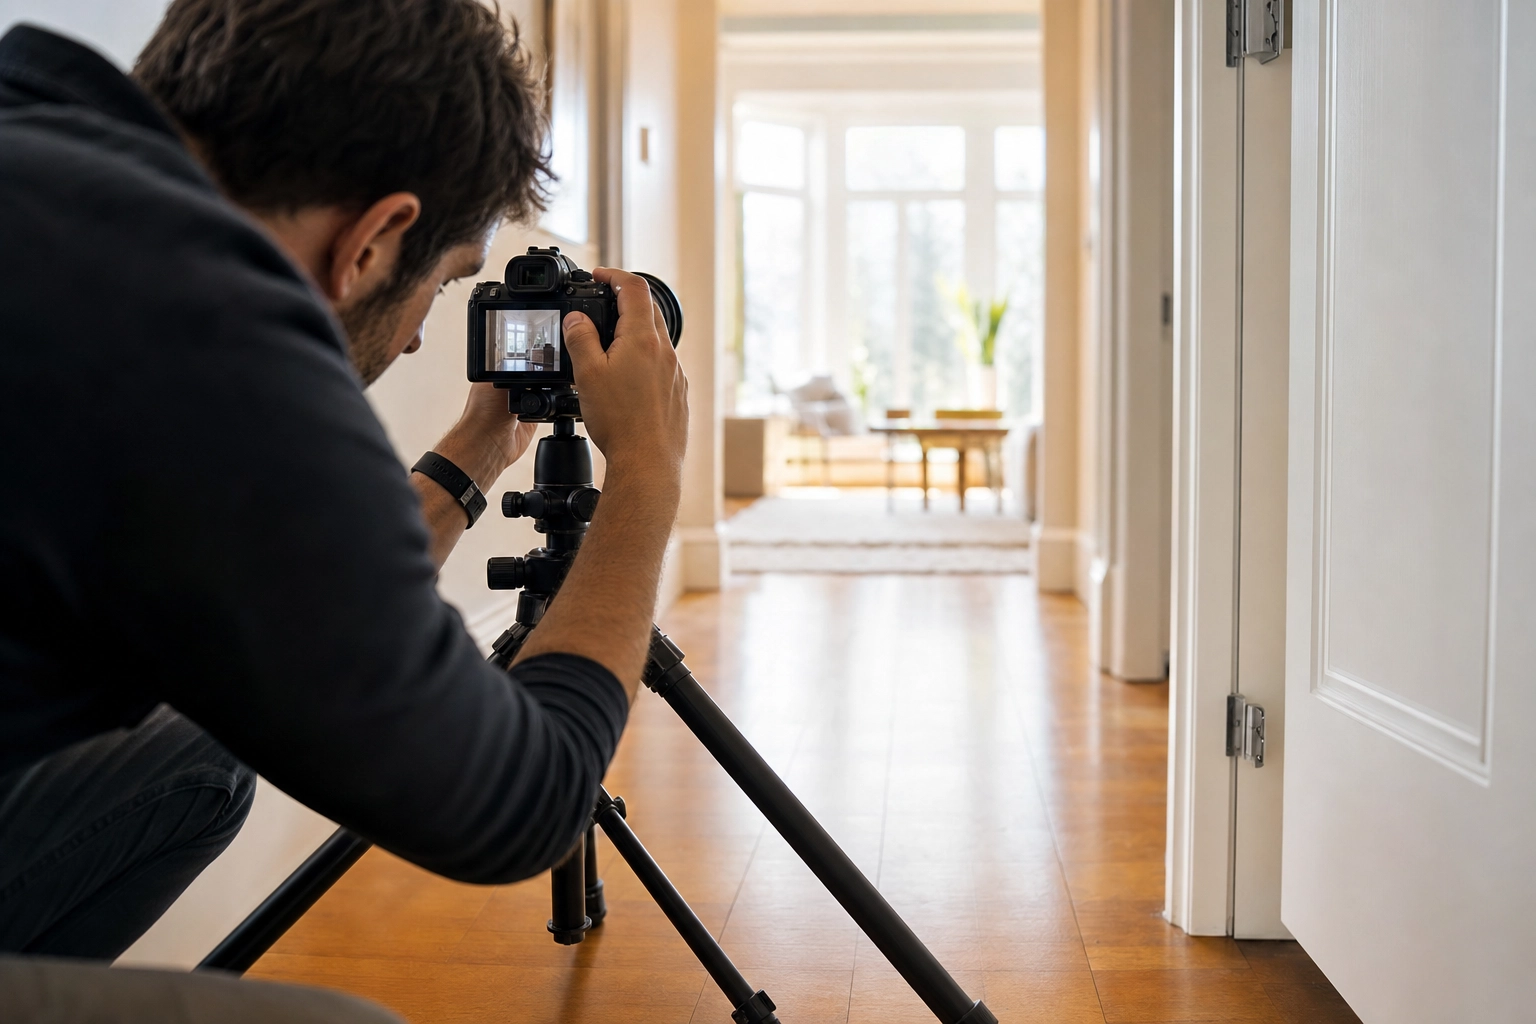
3. Tripod and geared head: the secret to perfectly straight verticals
A tripod isn't optional for serious listing work. It locks your composition, enables HDR brackets and flash blends, and — most importantly — keeps your verticals dead straight. Walls that lean ruin an otherwise great photo. Choosing a tripod for real estate photography comes down to two things: stable legs and a head that nails those verticals.
For the legs, look for carbon fiber: sturdy, light (under ~1.5kg), and easier on your back across a ten-property day. A good tripod drops low (around 30cm) for floor-level and bathroom detail shots and extends tall (around 160cm) without raising the center column, which introduces wobble. Options range from the budget-friendly Sirui T-2204X (around $200) up to Benro and Really Right Stuff carbon legs.
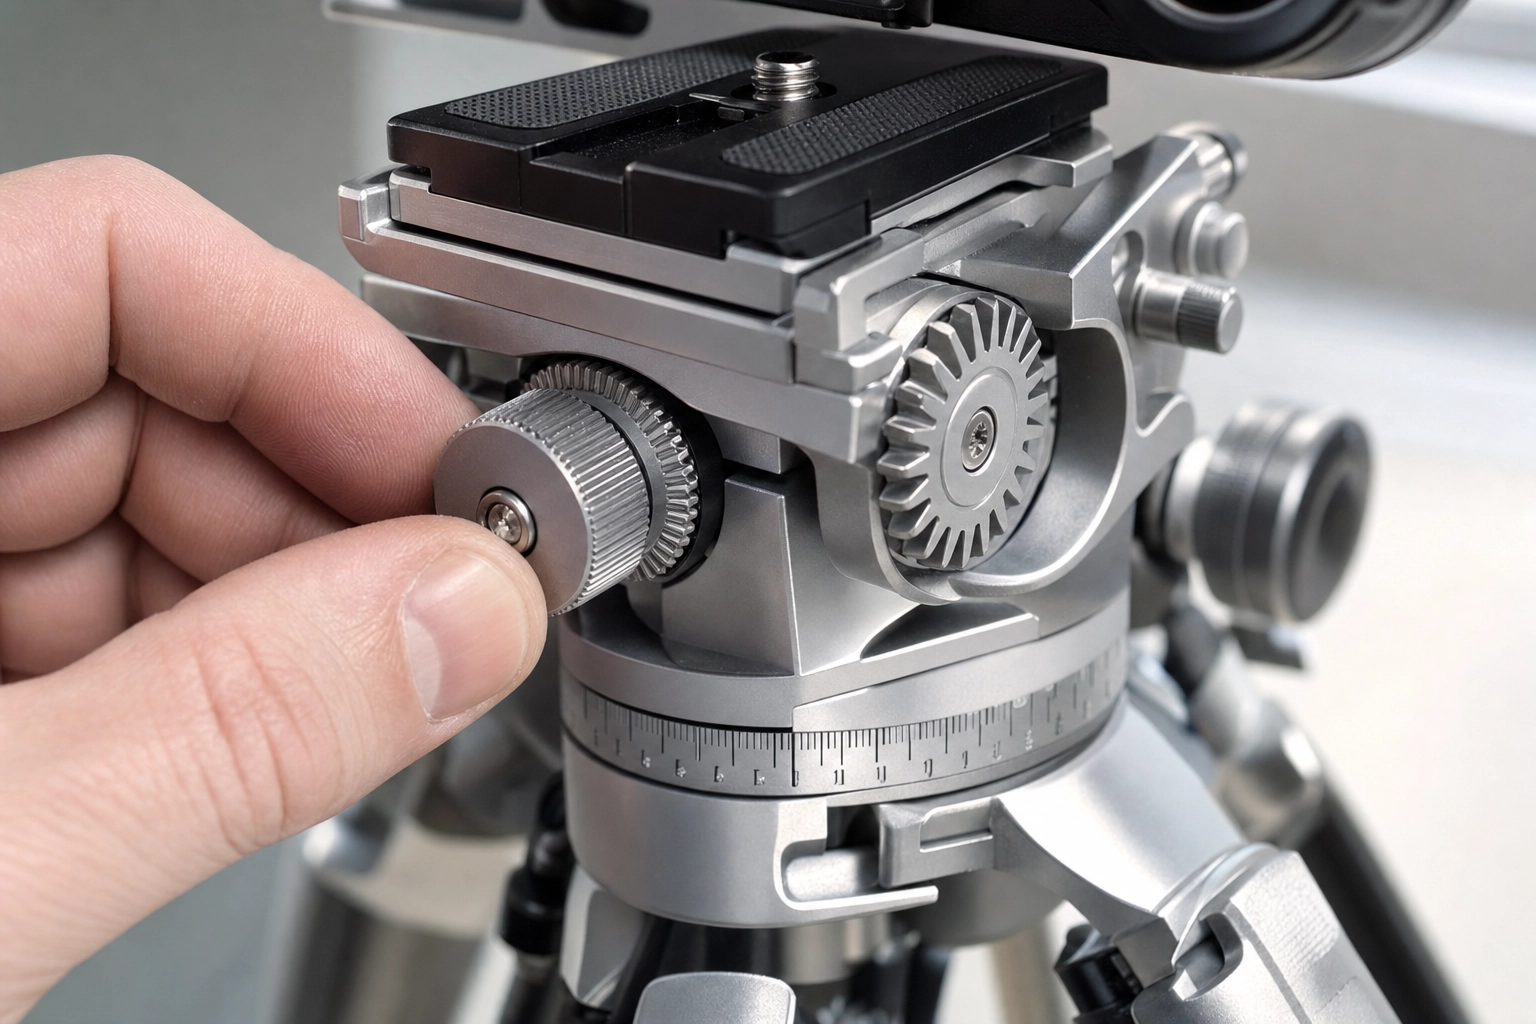
Geared head vs ball head
Here's the upgrade that quietly separates amateurs from pros. A ball head is fast but imprecise — you loosen it, the camera flops, and you fight to re-level. A geared head moves on three independent knobs, so you can dial exact verticals and horizontals one click at a time. Architectural shooters are near-unanimous on this: for straight lines, a geared head wins every time.
The Manfrotto 410 Junior is the classic entry point; the beefier Manfrotto 405 survives heavy pro use; and the Arca-Swiss Cube is the high-end dream. Pair whatever you choose with an Arca-Swiss L-bracket for quick portrait-to-landscape switches. The trade-off is honest: geared heads cost two to four times a comparable ball head and weigh more. For real estate and architecture, it's worth it.
4. Lighting: two off-camera flashes change everything
Here's a truth that surprises new shooters: off-camera flash is a better investment than a better camera. The quality jump from a $2,000 body to a $3,000 body is small. The jump from no flash to a two-flash setup is enormous — it's the difference between a murky, orange-tinted kitchen and a clean, evenly lit one. The right flash for real estate photography isn't about raw power; it's about getting light off the camera and onto the ceiling.
A starter two-flash kit
A practical lighting kit runs $500–$700: two speedlites (the Godox V1 or V860III are popular, reliable, and affordable), two lightweight light stands, and a radio trigger (the Godox X2T) to fire them off-camera. That covers the vast majority of interiors and fits in a carry-on.
For large rooms, vaulted ceilings, and commercial spaces, step up to monolights like the Godox AD200 Pro or Profoto B10 for more output and control. On a tight budget? Start with one flash and a trigger, learn to bounce it off ceilings and walls, and add the second light when cash flow allows. This is where the flambient technique comes in — blending a natural "ambient" exposure with one or more flash frames for clean color and balanced light. It's the backbone of modern interior work, and we cover the method in our real estate photography tips guide.
5. Circular polarizer: the cheapest upgrade with the biggest payoff
For $50–$150, a circular polarizer (CPL) does what no amount of megapixels can: it physically removes reflections. Twist it on for a sunny exterior and watch glare vanish off windows and glass, reflections clear off pool and lake water, hot spots disappear from granite and hardwood, skies deepen to a richer blue, and foliage saturate.
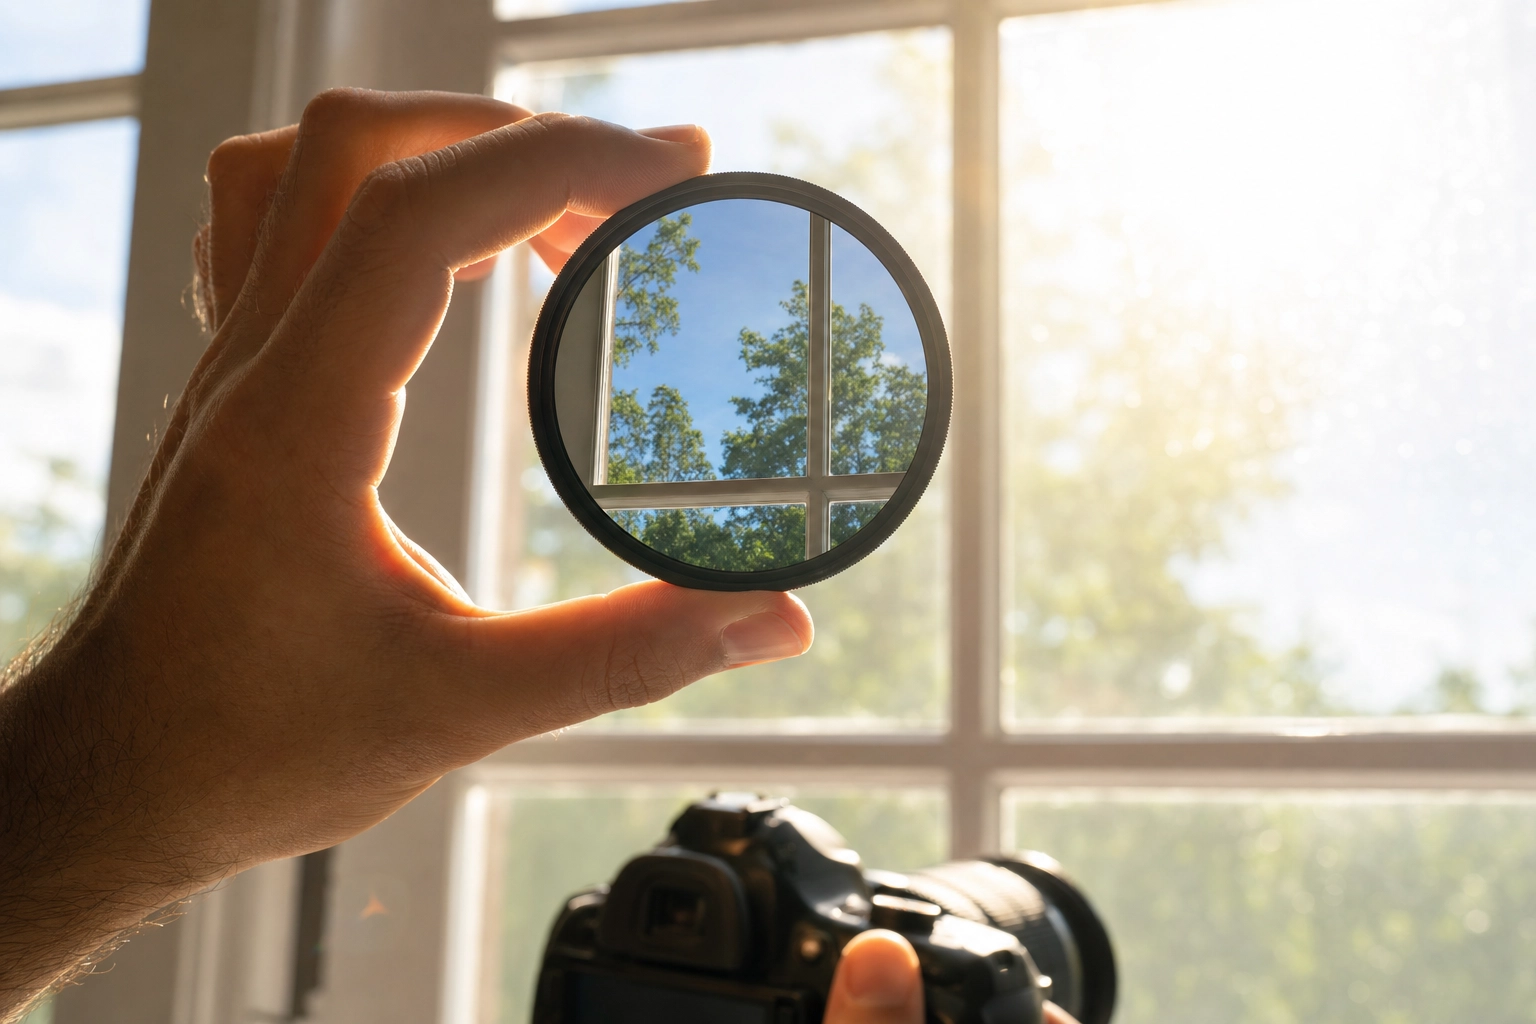
Buy a slim, multi-coated CPL sized to your widest lens (commonly a 72mm, 77mm, or 82mm thread). The slim profile matters — a thick filter ring can cause dark corners (vignetting) on ultra-wide lenses. It's the single best dollar-for-impact purchase in the bag, and the first accessory every exterior- and waterfront-heavy shooter should own.
6. Drone: aerials that sell land, lots, and luxury
A drone isn't for every listing — but for properties with acreage, pools, waterfront, rooftop views, or a setting worth showing off, an aerial is the shot that makes buyers stop scrolling. It establishes lot lines, proximity to amenities, and the sheer scale a ground photo can't convey.
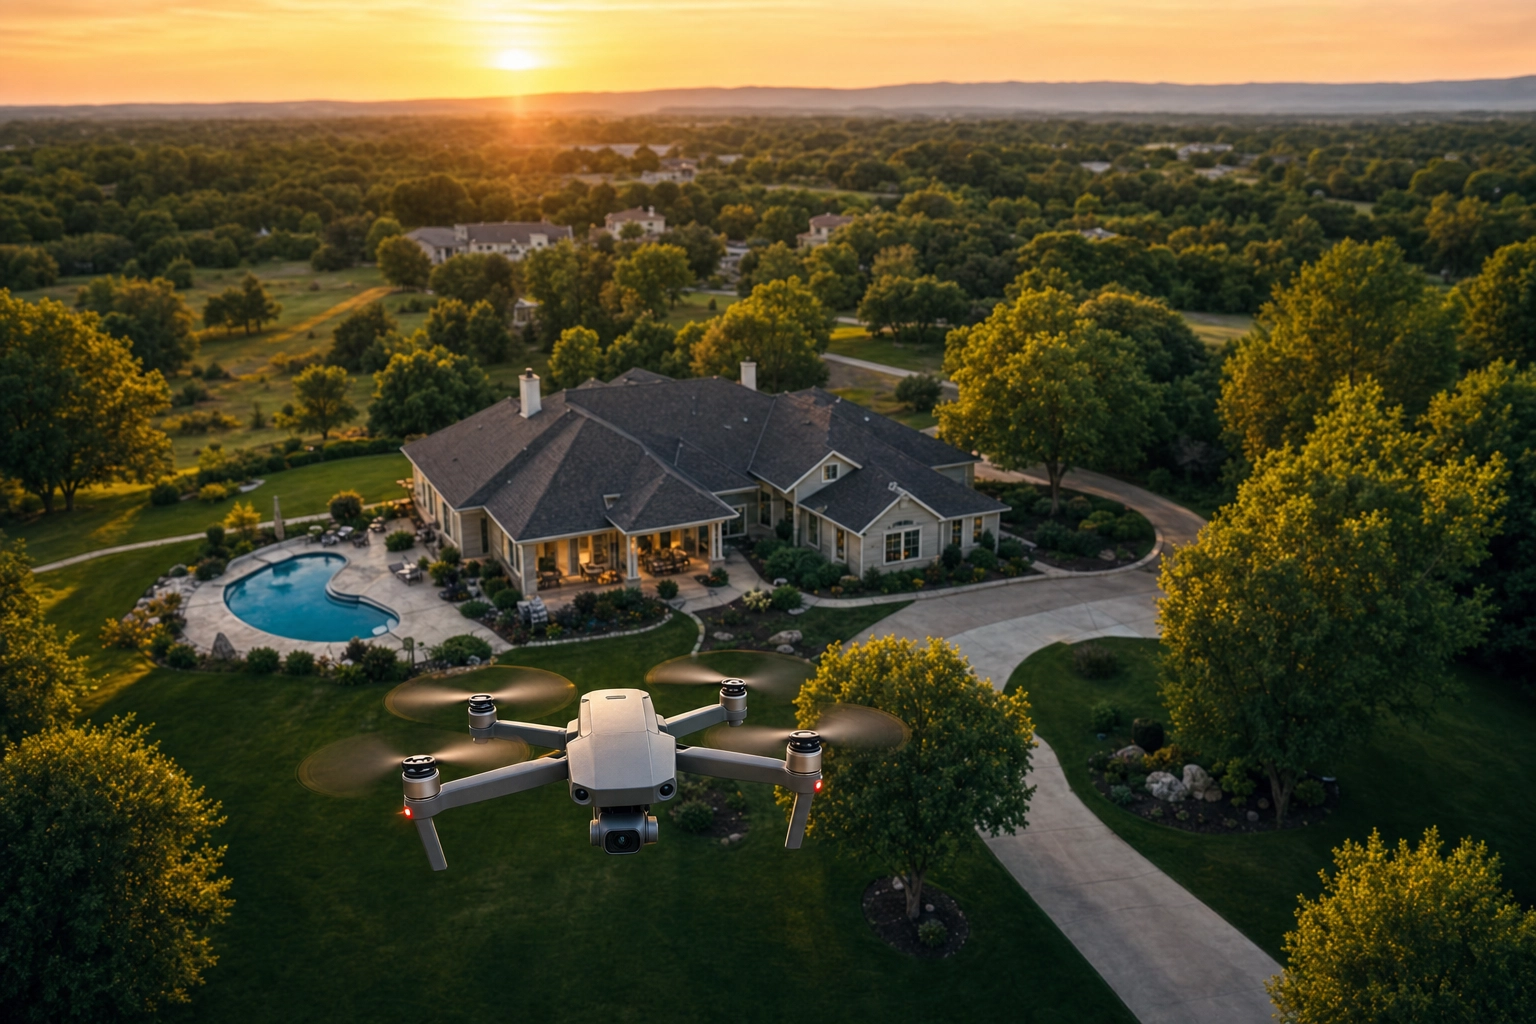
The DJI Mini 4 Pro (under 249g, around $800) is the practical default for most real estate shooters — light, capable 4K, and easy to fly. For commercial and luxury estates, the DJI Air 3 adds a 70mm zoom alongside the wide camera, giving you compressed, dramatic perspectives of large properties.
The license most gear guides forget
Here's the part most equipment lists get wrong, and it's important. In the United States, flying a drone for real estate is commercial use, which requires an FAA Part 107 Remote Pilot Certificate. The popular "under 250 grams means no rules" line is a misunderstanding: the sub-250g exemption only waives recreational registration. It does not waive the commercial license. If a drone shot is helping market a property — even your own listing, even "as a favor" — the FAA treats it as commercial work that requires Part 107.
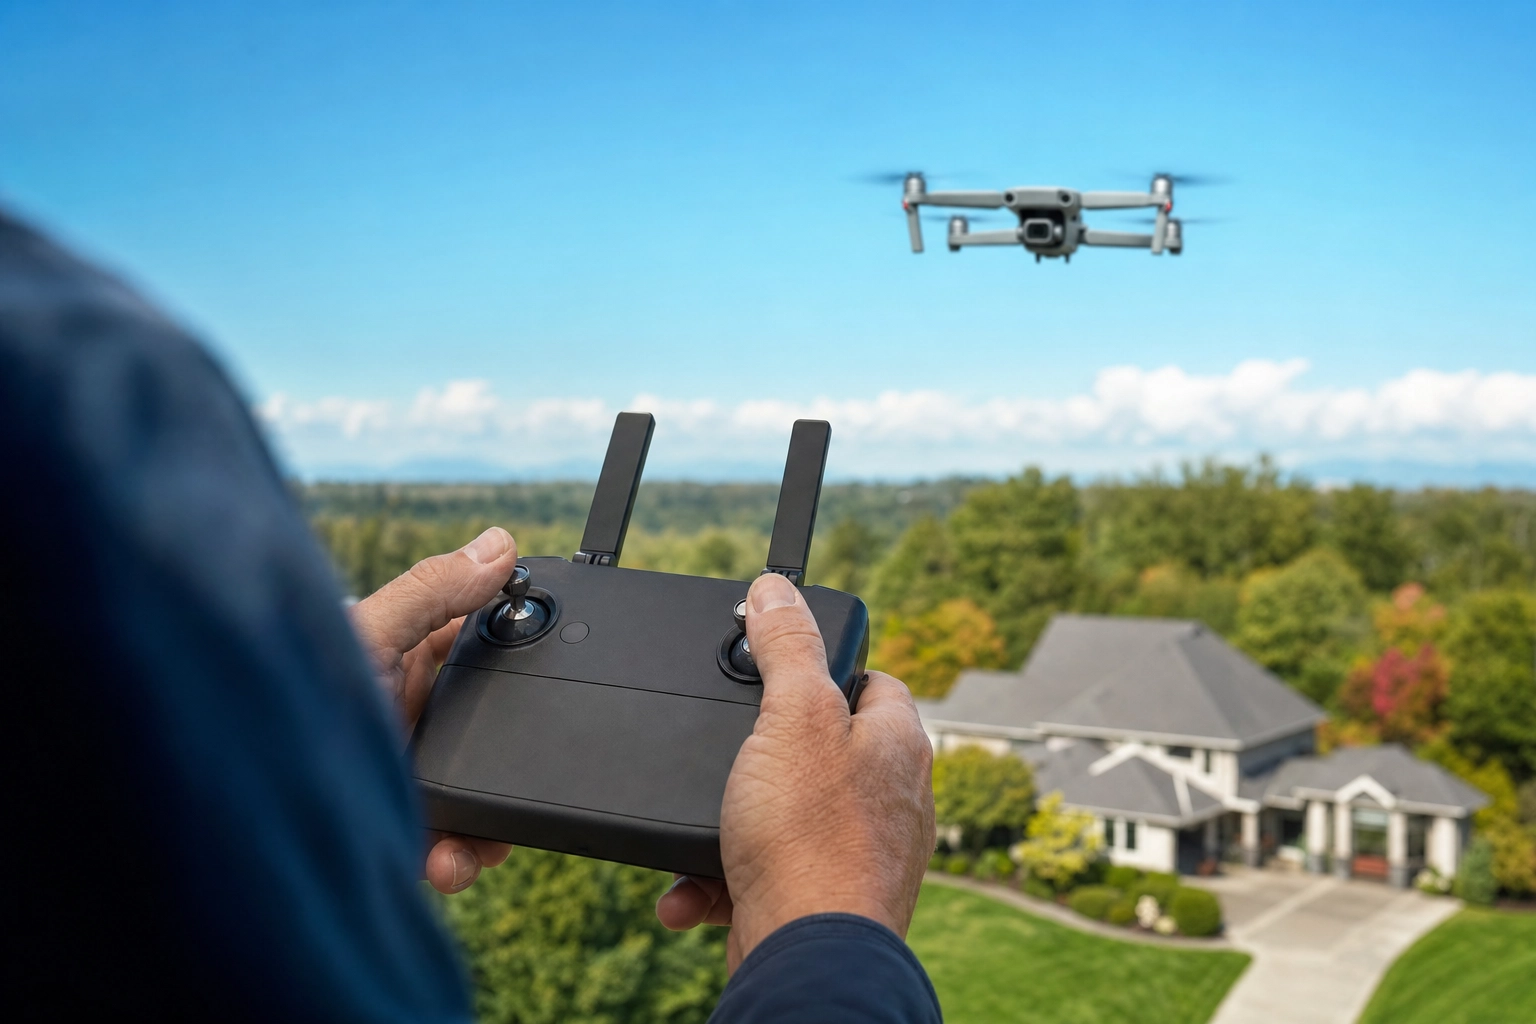
Once certified, the operating basics are straightforward: stay below 400 feet, keep the drone within visual line of sight, avoid restricted airspace near airports, and renew your certificate every 24 months. Skipping the license isn't worth it — penalties are steep, and so is the liability if something goes wrong.
The accessories that quietly earn their place
The unglamorous extras that save shoots:
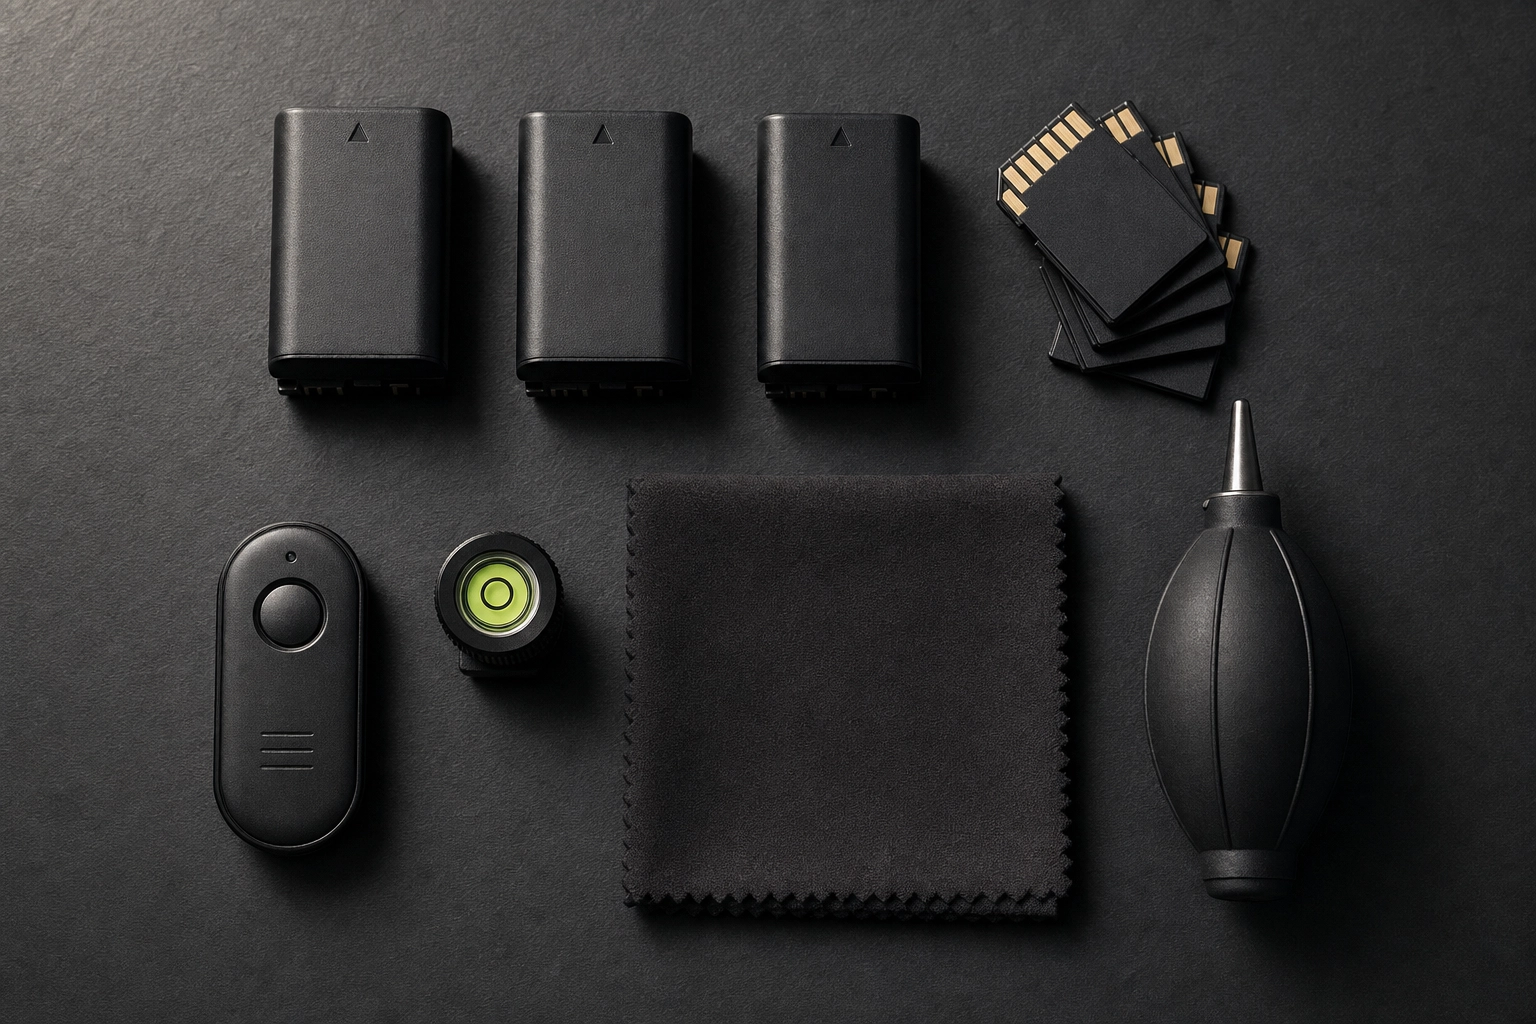
- Spare batteries (2–3). Mirrorless bodies and flashes drain fast across a full day.
- Fast, large SD cards — plus a backup. Lost files on a paid job are unforgivable.
- Remote shutter or phone-app trigger. Eliminates the tiny shake from pressing the shutter button.
- Hot-shoe bubble level. A $6 insurance policy for straight verticals if you're shooting on a ball head.
- Lens cloths and an air blower. You'll move between dusty exteriors and clean interiors all day.
- A padded backpack that fits a property walk. Comfort across multiple in-and-out trips is real.
Skip the gimmicks. Motorized sliders, gimbals, and oversized light modifiers look impressive on social media but rarely earn their weight on a stills-only listing shoot.
How to build your real estate photography kit step by step
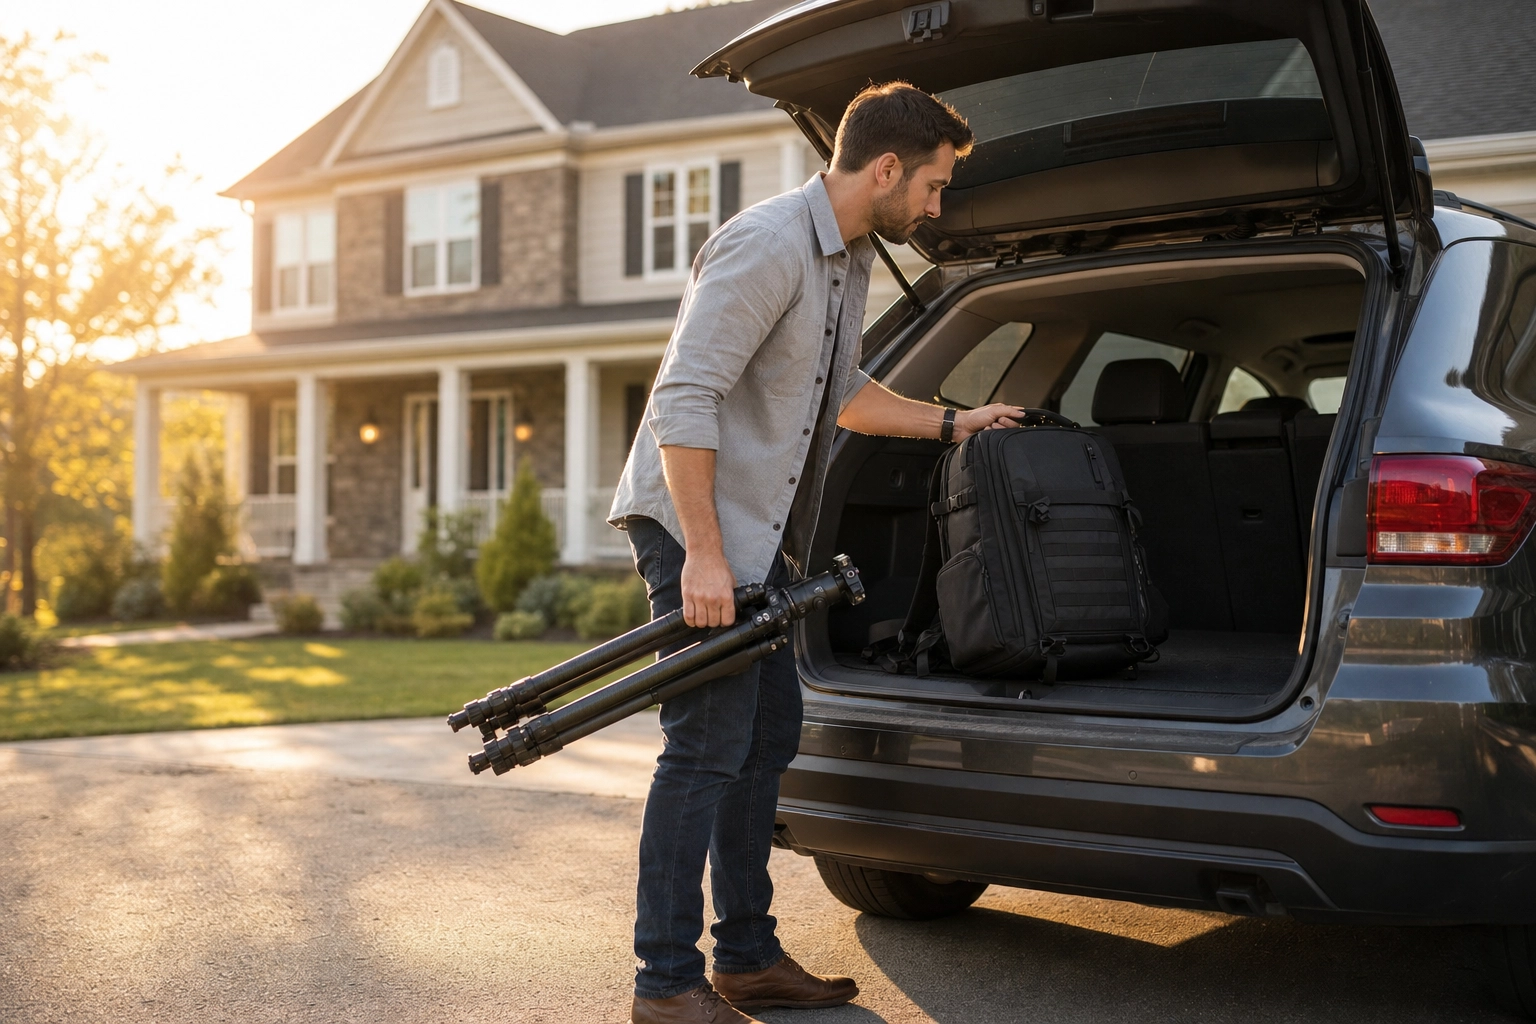
If you're building your real estate photography equipment from zero, buy in this order. Each step is usable on its own, so you can shoot paying jobs before the kit is complete.
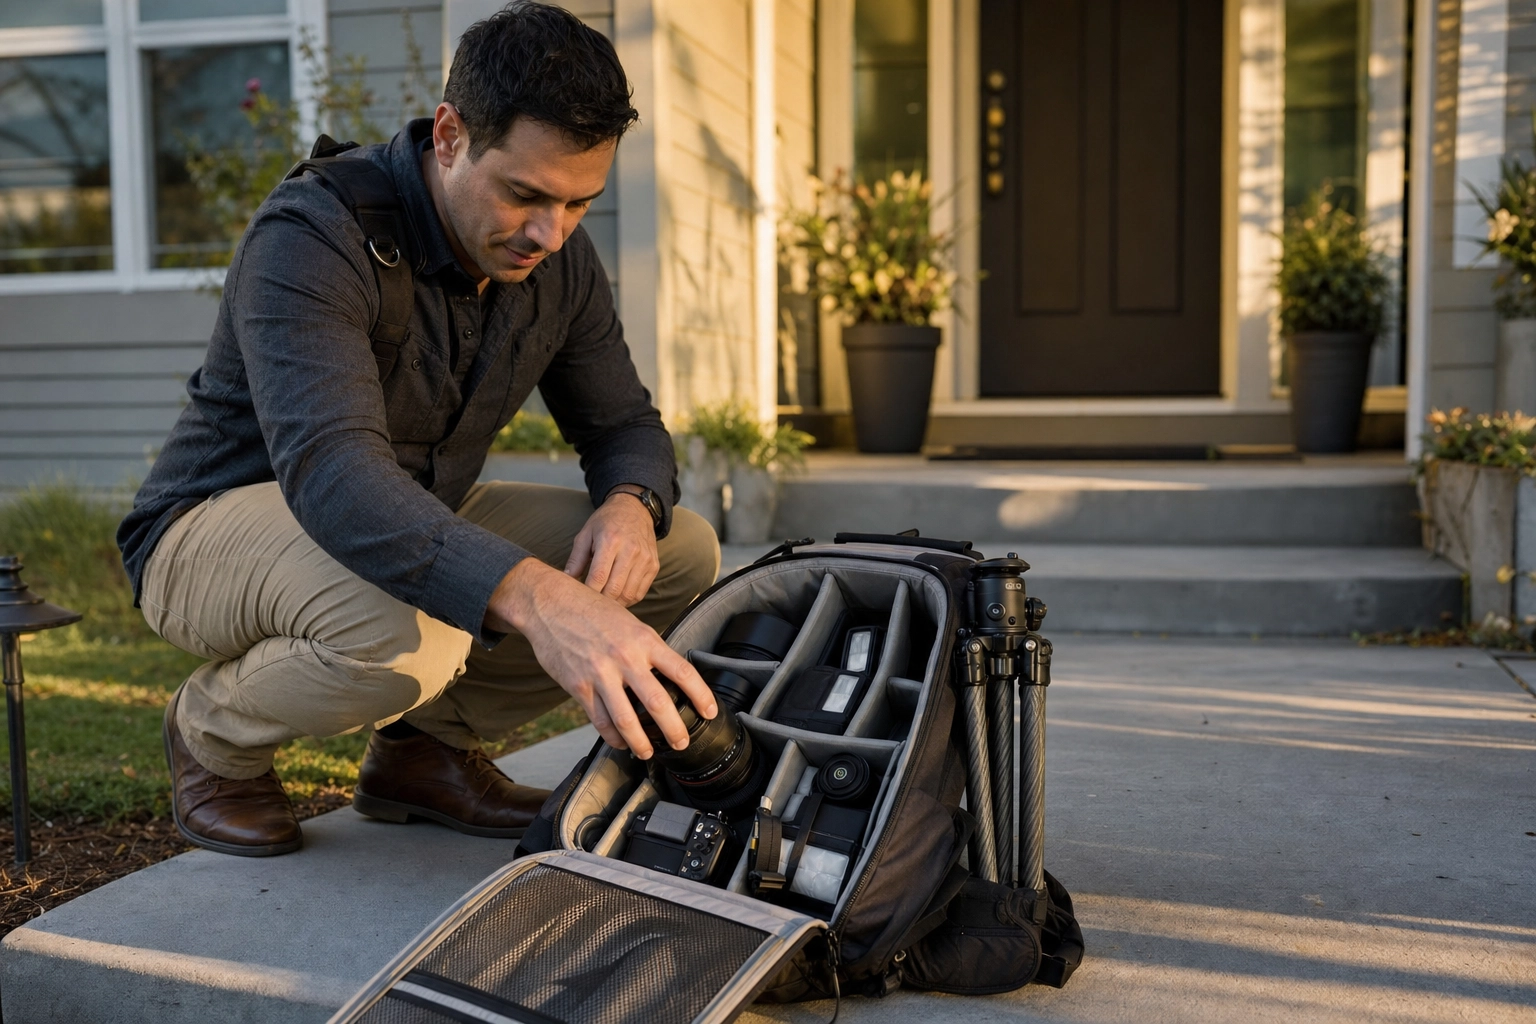
- Buy the body and wide zoom first. A used full-frame body plus a 16–35mm lens is a complete, shootable kit on day one.
- Add a tripod with a geared head. This is what makes your verticals straight and your exposure brackets possible.
- Add one off-camera flash and a trigger, then a second light once you're comfortable. Lighting beats almost any body upgrade.
- Add a circular polarizer for exteriors, pools, and waterfront listings.
- Add a drone — after you hold an FAA Part 107 certificate. Get licensed first, fly second.
- Set up a fast post-shoot editing pipeline so delivery never becomes your bottleneck. This is the step most new shooters underestimate — and it's the subject of the next section.
The most overlooked equipment in 2026: your post-shoot pipeline
Ask any working photographer where the time really goes, and the answer isn't the shoot — it's edit-night. Capturing a house takes an hour. Turning forty raw frames into a clean, bright, straight, MLS-ready set is what eats the evening. In 2026, your editing workflow is as much a part of your equipment as your tripod.
The traditional pipeline is a stack of software and hours: Lightroom and Photoshop for exposure and HDR blending, manual perspective corrections, sky replacement on flat-gray days, and clutter removal frame by frame. It works — it's just slow, and it scales by adding hours you don't have.
Why this isn't a pitch for video
Here's an honest fork in the road. Some equipment guides will tell you the "next upsell" is listing video, and push a photo-to-video tool as the logical next purchase. Be clear-eyed about that: video is a separate business with separate gear, separate software, separate licensing, and an entirely different skill set. It's a fine thing to add deliberately, but it is not part of a listing-photo kit, and bolting it on doesn't make your stills any better or get them out the door any faster. For listing photography itself, the leverage is in the still-image pipeline.
What the editing pipeline actually does
That's the lane Plotpane is built for. Upload your shots and a structure-preserving AI pipeline runs the whole post-shoot stack in a single pass — auto enhance for exposure, white balance, and clarity; HDR-style exposure balancing for bright windows; perspective fix for straight verticals; sky swap for gray days; lawn and pool revive; clutter removal; day-to-dusk; and virtual staging — at roughly 90 seconds per 4K image, with no visible watermark. You can see how the auto-enhance pipeline handles a raw frame, or how the whole workflow fits a working studio on our page built for photographers.
The guardrails matter, and they're the point: it edits stills only — there's no video here — it preserves the real architecture instead of inventing rooms, and it never fabricates a property that doesn't exist. The goal is the same photo you'd have produced on edit-night, delivered in the time it takes to refill your coffee.
Does the gear pay for itself? Kit cost vs shoot fees
Real estate photography has unusually fast payback. A ~$2,500 starter kit is typically recouped in eight to twelve shoots at common baseline rates — and after that, the gear is pure margin against every job. Add-ons like twilight conversions and virtual staging stack on top of the base fee, which is where studios actually make their money.
For the full profit-and-loss picture — baseline shoot rates, add-on markups, and the math on a busy studio — see our breakdown of real estate photographer pricing in 2026. The short version for an established shooter: once the hardware is handled, the highest-ROI upgrade usually isn't another lens. It's the editing pipeline that lets you take on more listings without adding more late nights — which is exactly why we built Plotpane the way we did for working photographers.
Gear gets you in the door — technique gets you hired again
A great kit is the easy part. Anyone can buy a camera; far fewer can walk into a dim, cluttered split-level and come out with twenty clean, bright, perfectly straight frames every single time. That consistency — repeatable verticals, bracketed exposures, a disciplined shot list — is what turns a one-off client into a referral engine.
When your kit is dialed in, put the time into craft. Our real estate photography tips guide covers the composition, lighting, and shot-list habits that separate "has nice gear" from "books out every weekend."
Frequently Asked Questions
What equipment do you need for real estate photography?
A complete real estate photography equipment list starts with a camera that handles ISO 1600 cleanly, a wide-angle lens covering roughly 16–35mm (full-frame equivalent), a sturdy tripod, and at least one off-camera flash. That four-item kit shoots professional-quality interiors. From there, a circular polarizer, a second flash, and a drone expand what you can offer — and a fast editing pipeline keeps delivery quick.
What lens is best for real estate photography?
A 16–35mm wide-angle zoom is the best all-around choice for full-frame cameras; on APS-C bodies, a 10–18mm or 10–20mm gives the equivalent view. The wide end captures full rooms while the longer end keeps proportions natural. Avoid shooting at the extreme wide end constantly — it distorts space and can misrepresent a property.
What camera is best for real estate photography?
A full-frame mirrorless body is the 2026 standard — the Sony A7 IV, Canon EOS R6 Mark II, and Nikon Z6 III are the most common picks at around $2,500. On a budget, a used full-frame body or a modern APS-C camera shoots excellent listing photos. Megapixels matter less than dynamic range and low-light performance. See our best camera for real estate photography guide for a full comparison.
Do you need a flash for real estate photography?
Not always, but it dramatically improves results in dim or mixed-light rooms. A single off-camera flash with a trigger fixes dark kitchens and bathrooms that no sensor can rescue cleanly, and two flashes handle nearly any interior. Many pros consider lighting a higher priority than a more expensive camera body.
Do you need a license to fly a drone for real estate photos?
Yes. In the U.S., using a drone to market a property is commercial work, which requires an FAA Part 107 Remote Pilot Certificate — regardless of the drone's weight. The popular sub-250-gram exemption only waives recreational registration, not the commercial license. Fly below 400 feet, keep visual line of sight, and renew the certificate every 24 months.
How much does a real estate photography kit cost?
A capable budget kit — a used full-frame body, one wide zoom, a tripod with a geared head, one flash, and a polarizer — runs about $1,500–$2,500. A full working-pro kit with a new body, premium lens, two-flash lighting, a carbon tripod, and a drone reaches $5,000–$8,000. You can start earning with the budget version and upgrade as jobs come in; our real estate photographer pricing guide shows how fast it pays back.
Is a geared head worth it over a ball head for real estate photography?
For real estate and architecture, yes. A geared head lets you fine-tune verticals and horizontals one knob-turn at a time, so straight lines stay straight without the back-and-forth of a loose ball head. It costs two to four times as much and weighs more, but the precision pays off on every frame where leaning walls would otherwise ruin the shot.
Marcus Vela leads real estate imaging at Plotpane, where he works with solo agents, photography studios, and brokerages on faster, cleaner listing workflows. This guide is reviewed and updated as 2026 gear and pricing shift.